Solar Panel Installation Assessments for Toronto Homes
Before going all-in with a solar panel install it is important to understand if your roof system is a good candidate before spending 10’s of thousands of dollars on an install that will not maximize your ROI or properly offset your electricity usage. Use the information below as your comprehensive guidebook on how to properly evaluate your home’s solar potential, what factors to consider when evaluating the amount of solar panels to install and where to install them, how to get a very accurate assessment of your roof’s solar assessments, and the considerations for designing a roof for home additions and new home construction to maximize electricity generation.
Through many hours of research and investigation for our integrating solar into our own home building projects we believe this is a great and honest resource for any homeowner or investor looking to offset electricity usage on their home or property. Solar panels are the only way to viably create Net Zero Homes in Canada (specifically in Ontario) so we are looking forward to being part of Canada’s journey to creating more sustainable and energy-efficient homes.
If you have any feedback for us please leave us a comment at the end of the article!
What are the key factors for a good roof-mounted solar system?
Before you go any further, make sure you check the following boxes before running any calculations as they will severely affect your solar array’s energy performance. If you do not check off all of these boxes you will have a hard time getting a quote from a reputable solar installer as they will not want to install systems that won’t perform and/or offer a good return on investment.
-
Few or no obstructions
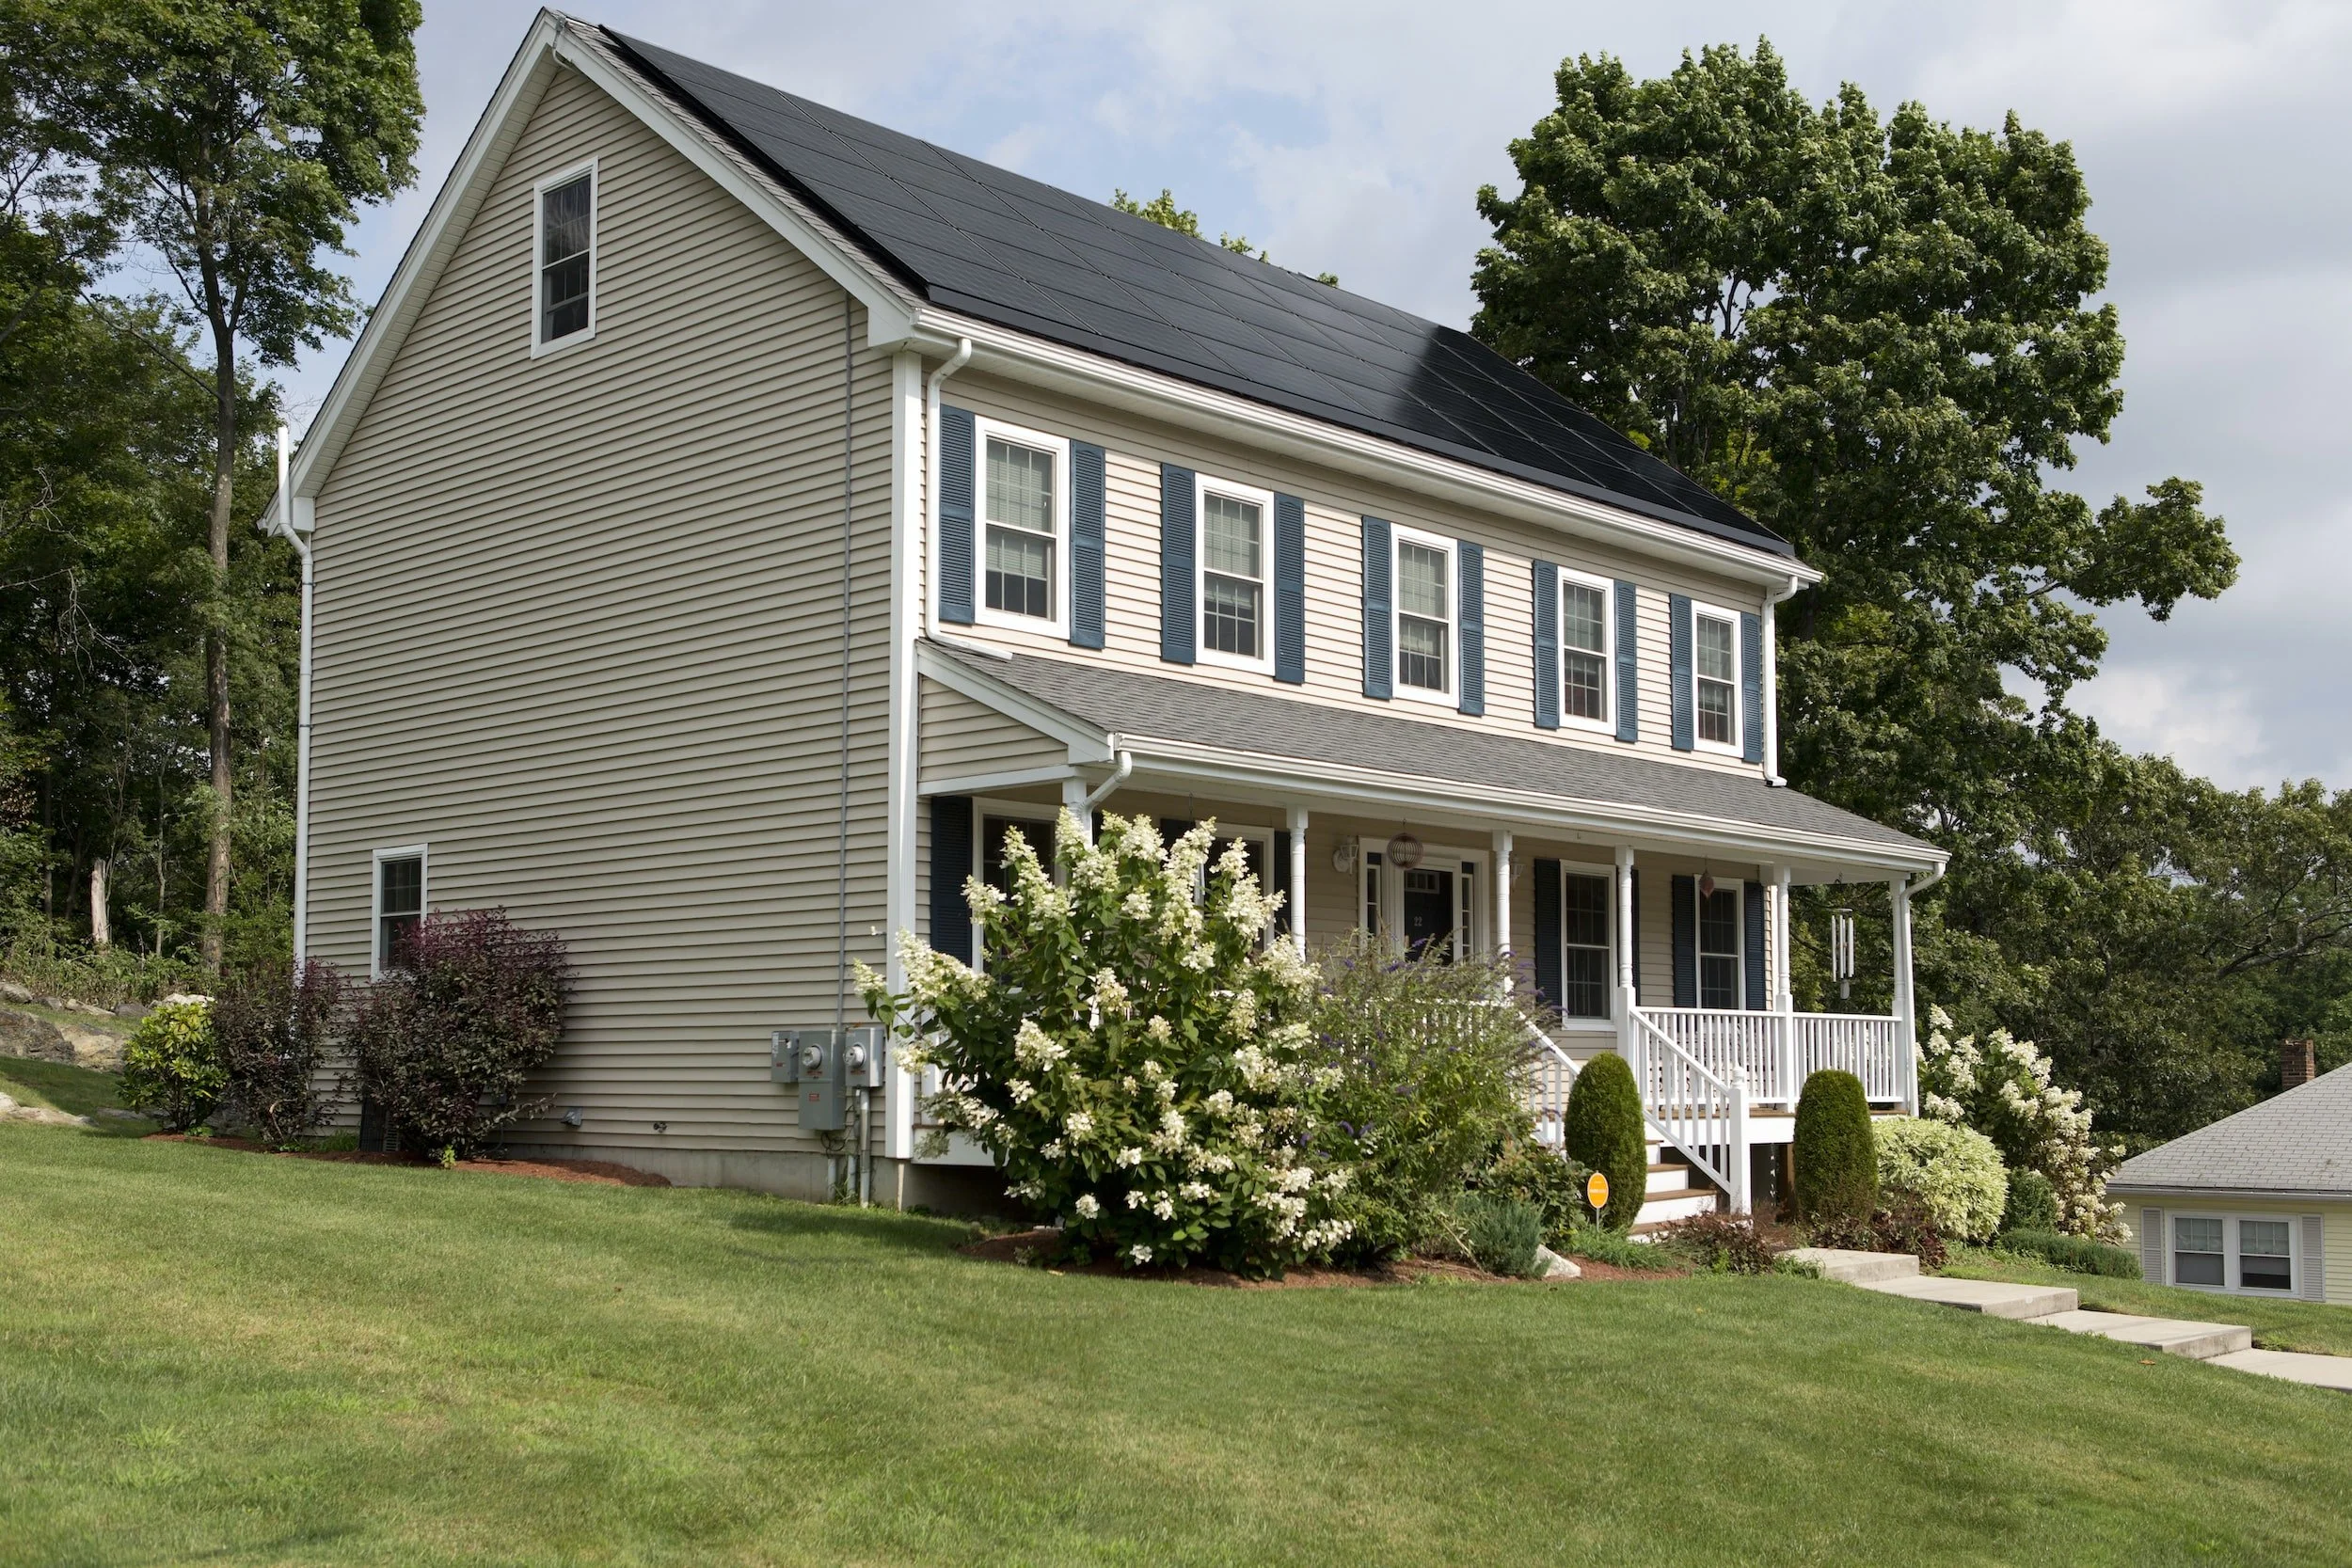
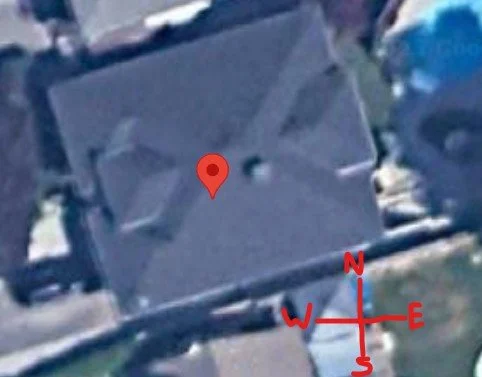
Obstructions come in the form of a complex roof system (i.e. many hips and valleys where you do not get a straight run of flat roof), shading from other homes or trees, and roof terminations like chimneys. See below two examples of a home with few obstructions versus a home with many obstructions and a complex roof system.
-
South, East, or West-facing roof layout
If you take a look on Google Maps (which the images below are from, pardon the quality) and input your property address you will be oriented with South being at the bottom of the map. If your roof on the south-facing side of the property has a non-complex roof and little to no shading you might want to progress to the next step. Even if your East or West-facing roof lines pass the no-obstruction, non-complex roof test you should proceed
-
Roof Slope
The last-but-not-least consideration when evaluating your home for solar is to determine your roof slope (i.e. the angle from horizontal that your roof slopes from eavestrough to the peak). If you are building a new home or home addition with new roof system this slope is very easy to pull from the architectural drawings, but if it is an existing house you will have to do some work to estimate this. You can check out this roof slope calculator to see what the process looks like (just a heads up that you will need to get into your attic to do it properly).
The reason slope matters is because there is an optimal angle that will maximize energy production all year round, and is based on the latitude your home is located. In Toronto the optimal angle for peak production is about 30-35 degrees, which works out to a 7/12 to 8/12 roof pitch. You will be able to install solar for angles from 15-56 degrees (4/12 to 18/12 roof pitch) from horizontal, but note that the lower the angle the more you have to worry about snow loading during the winter months which will affect production.
-
Approval from your Electricity Distributor
Although not directly related to the orientation of your home, your ability to set-up a cost-effective solar system will be in the hands of your electricity distributor (i.e. Toronto Hydro for Toronto customers). Before you go any further make sure you reach out to your provider to determine if your property will be eligible for net metering. The email you will want to reach out to for Toronto Hydro is der@torontohydro.com and if you have a different electricity provider you can check out their associated webpage about their net metering program. We cannot stress enough how important this is because if they do not approve your property there is no point in proceeding with the steps below.

How to Assess Your Home’s Feasibility for Installing Solar Panels
Step 1: Measure your roof’s square footage + roofing age assessment
You will want to figure out how many solar panels can fit on your South, East, and/or West facing roof lines, and the best way to do that is by grabbing a measuring tape for existing roofs, or completing take-offs of the proposed roof if you are completing a new home build or home addition project with a new roof system. If you are not able to access your roof for any reason to complete the measurements you can always get a roofing contractor to come on site to take the measurements. Since you will want to upgrade your existing roofing if it is in need of replacement BEFORE you install solar panels you may want to get a roofing contractor involved anyways to get pricing for installing new shingles or another roofing system, so at that point they would be able to give you the measurements you need if they are a competent company.
See example below for our new home build at Scarborough Heights, which was a new home construction that we completed and had plans to work off of. As you can see below there is ~ 800 square feet of space on the roof slope that is facing South. The picture below is the roof line we used to run a feasibility analysis for installing solar panels.

Step 2: Determine the approximate number of solar panels that can fit on the roof
This step differs depending on if you have architectural plans or will need to evaluate an existing roof. If you have architectural plans you can simply create the dimensions for a solar panel for the chosen roof line and figure out how many panels will fit (see below).
For an existing roof system you will either need to measure out the roof system by going on top of the roof and measuring widths and lengths or you can reach out to us and we can try to determine the maximum number of panels you will be able to install. We are able to use software to figure out roughly the number of panels and the size of array you will be able to fit on your roof. Since not every solar panel is the same size we will need to determine the most ideal size of panel for your roof system, but if you are doing the rough calculation yourself you can use the dimensions of 3.5 ft x 5.5 ft per panel and assume a portrait orientation (longer side parallel to roof slope) and 400 Watts per panel. Multiply the number of panels that will fit by the power output of each panel to get your array size. For residential applications you will not be able to install an array larger than 10 Kilowatts (kW), so keep that in mind when you are calculating you system size.

Step 3: Find your proposed roof’s azimuth and calculate energy production
Once you have the approximate number of solar panels and the total array size and power output you will need to find out how much energy the array is going to produce in a year. You are going to want to go to a handy calculator located on the National Renewable Energy Lab Website. You will need to provide the following information:
-
Property address (just type in your address and confirm it is pulling the right data based on the map view provided)
-
DC System Size (i.e. the total power output of the array that you would have calculated above)
-
Array Type, which you will want to keep as standard to be more conservative for now.
-
Array Type (You will need to click Fixed: roof-mounted from the list of options)
-
System losses (which you should keep the same)
-
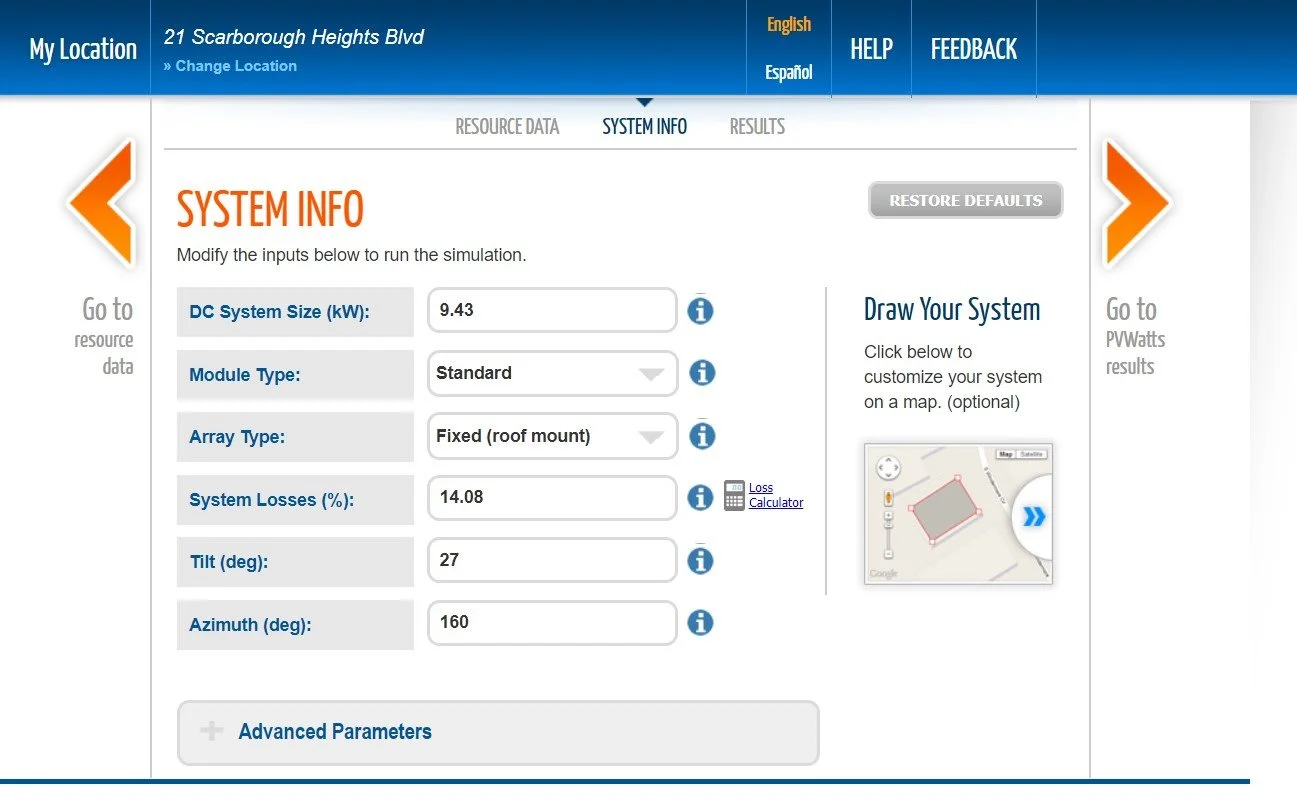
Tilt of the solar array (which you would have found from your preliminary analysis of your existing roof from above or from your architectural plans). In our example we have a 6:12 pitch which works out to ~ 27 degrees
-
Azimuth (South being 180 degrees)
Going off of the example provided above with our home building project, we have a south-facing roof but it is not positioned perfectly South as shown. It is approximately 20 degrees East of South. Since we know that South is 180 degrees and East is 90 degrees, the Azimuth for the roof would be 160 degrees (180 – 20). See the figure below that shows the values inputted for our new home build solar panel installation example. Note that the system size is in kW not Watts, so divide by 1000 to input your value from above. Also do not worry about the advanced parameters for preliminary analysis of your system.
Step 4: Analyze your Results and Calculate a Conservative Yearly Energy Production Value
You will press the “go to PVWatts Results” and the calculator will give you the estimated energy product for your solar array based on the information provided. These numbers are only approximate but serve as a representative estimate for what to expect of your solar array. Of course there are many factors that may affect energy production (snow, shading, bad weather, etc.) so if you want a more detailed calculation you can reach out to BVM Contracting to complete a more thorough analysis for you. The conservative estimate we give people is 1100 kWh/year produced per kW of array installed, so in the example above the conservative number would be 9.34 x 1100 = 10 274 kWh (kiloWatt Hour, which is the unit of energy derived from multiplying the power output by time) of energy produced per year. This is compared to the 12 154 kWh/year estimated by the calculator, so you can use the range between the conservative estimate and the calculated estimate to come up with a range of energy output per year for your system.
See the attached results from our analysis of 21 Scarborough Heights Blvd. below.

Step 5: Compare your annual electricity usage to the annual energy production to determine how much you can offset
Your electricity provider will have your monthly electricity consumption shown on your online portal or with your paper billing. It is recommended to find a full years worth of energy consumption information so you can figure out how much you will be offsetting your bills with installing solar.
For Grid-tied PV systems (which are the most cost-effective systems to install), your electricity distributor will have to grant approval (as discussed above) for you to connect to the grid and will give you credit on your account based on your solar production that you can put towards future billing. The goal is to size the system so that you are not producing more than you consume, because many of the credits expire after a certain amount of time (for Toronto Hydro it is 12 months) so there is diminishing returns for oversizing a system unless you create a system that can accommodate a battery storage system.
Step 6: Reach out to BVM Contracting to get a Solar Supply and Installation Quote
BVM Contracting will be able to help confirm your preliminary analysis and get pricing into your hands to ensure you are able to calculate your return on investment for installing a solar array on your roof. We are able to help design and optimize your solar array, recommend the most reliable equipment to support your solar installation, and make sure there is full transparency throughout the installation and grid-tie process.
Other Important Considerations When Assessing Solar For Your Home
-
Your Monthly Electricity Bill Amount Will Never be Zero
When calculating a return on investment for your solar installation make sure that you determine which part of your bill is static (i.e. will not lower due to your solar production). You can go onto the Ontario Energy Board Website and use their residential electricity bill calculator to figure out how much your monthly bill would be with 0 dollars payable for electricity use. In Toronto that minimum fee is just over $40 per month, which accounts for delivery and regulatory charges. This does not mean that you will need to pay every month, as long as you have enough credits to pay for the total bill amount from previous months where you produced more than you consumed.
-
If you want grid resiliency consider a Back-up Battery Storage System
For standard grid-tied solar systems, if the power goes out you will not be able to use the energy created from your solar panels without the correct equipment in place. Typically the solar panels only provide the energy created back to the grid in those set-ups, unless:
-
You have an Enphase Sunlight Back-up system installed, or
-
Have a battery back-up storage system installed, which can be completed with Enphase IQ Batteries or similar products
Batteries are a new frontier in residential solar systems, make sure that when you are planning on installing a battery storage system that your installer understands where it can be placed in your home and that the other equipment being installed can support the battery system. With the help of our solar distributor we will work with clients looking for battery storage as part of their overall solar installation. Note that when considering battery storage that the overall installed cost of your system will substantially increase. This is because of the additional equipment needed and labour to properly set-up the system with your existing electrical system.
-
-
Always ask what equipment is being installed when getting pricing for your solar system
Not all equipment is created equally, there is higher quality panels, inverters, and brands that you should make sure your solar installation team is using to ensure that you are getting the best. For Solar Panels Longi, QCells, and Trina Solar are great brands for panels, and SolarEdge, Enphase, and Fronius are great options for the behind-the-scenes equipment needed to connect your panels to the grid or provide your home with resiliency when there are grid outages. For roof-mounted systems Fast Rack is the leader in providing racking solutions. Within these great options there are pros and cons and a good solar installer will be able to figure out which system makes the most sense for your needs.
What is the cost per watt to expect for Installing Solar?
The realistic cost per Watt for a reputable grid-tied solar install will be between $2.50 – $3.50, and increases substantially from there depending on if you plan on adding in battery storage or an energy hub system that can allow for future expansion of the system into battery storage. The pricing varies depending on the number of solar panels, how difficult the solar panel layout is, and the brand of inverters/microinverters used.
If you want an accurate quote for installing a solar system on your home please reach out to use and we can evaluate your property and give you more accurate pricing.
We are the home builder with a green edge
We are a one-stop-shop for homeowners and real estate investors looking to work with a General Contractor/Home Builder that can integrate a solar installation for Home Additions and New Home Builds across Toronto. We are the builder that will be able to help you on your journey to creating a Net Zero Home and can integrate solar with other green building techniques to deliver a sustainable residential construction experience. Reach out today to learn more!
About BVM COntracting
BVM Contracting is a full-service General Contractor or Home Builder located in Toronto. We provide home renovation and building services for major home renovations (kitchen renovations, bathroom renovations, basement renovations, full interior renovations, home additions, lot severances, and new home construction). Our goal is to help guide our clients through the process of renovating their home, from concept to completion.
Further than providing General Contracting and Project Management for major home renovations, we also offer value-added services such as renovation financing, renovation rebate consultations and services, building permit and design services, smart home installation services, and real estate investor services.
To learn more about our offering by visiting our services page.