Welcome to WordPress. This is your first post. Edit or delete it, then start writing!
Author: wpx_bvmadmin
-
Why Cost Per Square Foot Lies (And What Actually Drives the Number)
TLDR: We recently finished an interior renovation that came in over $300 per square foot, and we are starting a 5,100 square foot custom home in Cliffside that prices out at $362.75 per square foot. Nearly the same rate, wildly different projects, and neither number would tell you what your project costs. Per-foot pricing is driven by what sits in the denominator and by a stack of costs that never shrink with the house. Here is how the number actually works, and what to ask instead.
Two Quotes, One Meaningless Comparison
Two builders. One quotes $350 per square foot, the other $450. In a market where a custom home in Leaside or Birch Cliff can pass $1.5M all-in, that gap looks like it should decide everything.
It decides nothing, because the two numbers are almost never measuring the same thing. One builder is counting the basement, the other is not. One includes HST, allowances, and site costs, the other stops at sticks, bricks, and basic labour. Before you compare rates, you have to know what got divided by what, and most homeowners are never told.
The Mechanic: You Pay for the Footprint, Not the Floor Area
Here is the part of per-foot pricing that almost nobody explains. A large share of your budget is priced off the ground-floor outline of the house, not the total floor area. Stack a second storey on top and these lines barely move:
-
Excavation. It is the same size hole being dug whether the house above it is one level or two.
-
Foundation. Poured once, under the footprint, no matter how many storeys it carries.
-
Roof. One roof covers a bungalow and a two-storey alike.
-
Kitchen. A $100,000 kitchen costs $100,000 in a 1,500 square foot house or a 4,000 square foot one.
-
Utilities and servicing. The connections running to the house do not care how much floor area sits behind the wall.
-
HVAC. Mostly inelastic. Equipment and ducting grow a little with the house, but the cost per square foot of serving it keeps falling as the house gets larger.
Plumbing is the one that surprises people: it scales with the number and type of fixtures, not with area. A bungalow with four and a half bathrooms, a laundry, and a kitchen will out-price a larger two-storey home with three and a half bathrooms. What does scale roughly with area is the finishing layer, flooring, baseline electrical, lighting, paint.
Divide a fixed stack of costs by more square footage and the rate falls. That is the whole trick behind most low per-foot numbers, and it is also real: there are genuine economies in building bigger, up to a point.
Why a Bungalow Is the Most Expensive Shape Per Foot
Run the mechanic in reverse and you get the bungalow. A single-level home carries the same size roof, the same utility runs, and the same kitchen as a house twice its floor area, just spread over less of it. Every fixed cost lands on fewer square feet, so the rate climbs. Adding levels buys real efficiency per foot, even though the total climbs because there is more house. Which is one more reason the per-foot number misleads: the “cheaper” per-foot house is usually the more expensive one in total.
Where the Number Turns Around
The falling rate does not fall forever. In our experience the economies of scale run out somewhere around 4,000 to 5,000 square feet. Past that, families are typically importing windows and doors, stepping up to premium tile, and choosing finishes at a level that resets the math. Structure does the same thing: that Cliffside home carries a steel package of over $50,000, moment frames and cantilevers included, because of how the clients wanted the stairs to the second level to work. Taste and complexity, not floor area, drive the top end.
The Denominator Problem
That Cliffside custom home is a working example. It has roughly 5,100 square feet across three levels, and the $362.75 rate only looks moderate because the basement is inside the count. Count above-grade space only and the same house reads hundreds of dollars per foot higher, with not one line of the budget changed.
This is why our published ranges come in pairs: $325 to $425 per square foot on total finished space including the basement, or $400 to $550 counted above grade only. Up to $100 per foot of difference, and it is purely a function of what gets counted. A builder quoting on total finished footage is not building you a cheaper home. They are using a different denominator, and a project can sound 20 to 25% more affordable while costing exactly the same.
So when two quotes sit far apart, the gap is almost always a measurement difference or a scope difference, not a discount. On top of the denominator, most per-foot quotes quietly exclude HST (over $100,000 on a $1M build), finish allowances, site work, and soft costs like drawings, engineering, and permits that can add $50,000 to $100,000 or more in Toronto.
Renovation Per-Foot Is a Number With No Meaning
We never price renovations by the square foot, because a renovation is priced on how much of the existing house gets touched, not on its area.
The renovation we finished at over $300 per square foot shows why. That scope included new windows, all new electrical, mechanical, and plumbing, a $100,000 kitchen, herringbone flooring, accent walls, new stairs and railings, and virtually every board of drywall stripped and replaced with new insulation throughout. The identical house with a lighter scope would have landed at a fraction of the rate.
Whether the kitchen is in or out of scope moves the number substantially, and even inside a single line the swing is enormous: a $40,000 kitchen against a $100,000 one, a $25,000 window and door package against a $50,000 one. Anyone quoting your renovation by the foot before understanding your scope is guessing, and you will pay for the guess one way or the other.
What Most Homeowners Get Wrong
The mistake is not choosing the wrong builder. It is comparing per-foot numbers as if they were prices, then designing to the lowest one. The predictable ending: the low-number builder finds the missing money in extras after the contract is signed, or the project slows down while they hunt for savings they never priced. The total lands about where an honestly priced quote would have started, plus the stress.
The other thing homeowners misread is small-project pricing. Smaller jobs genuinely do cost more per foot, and not because anyone is gouging. Some costs arrive whole no matter the size of the job, and the smaller the job, the more margin it needs to carry it as a project against larger ones. That is not a reason to spend more than you planned. It is a consideration for setting a realistic budget and finding the right team for a smaller project, rather than being surprised by unit pricing that looks high against a big-build rate.
The BVM Approach: A Total, Not a Rate
When a client opens with “what is your cost per square foot,” we tell them plainly that we do not do that, and then we show them what we do instead.
We work to understand the scope first, ask the questions that actually move the number, and build a total cost for the project, line by line, from demolition to finishes. Client selections get their own budget, priced from a database of real past and current BVM projects rather than a guess. When someone needs a number on the spot, we go back to that database and give a representative top-line figure from similar completed projects, a real total instead of a misleading rate.
We hold this position because per-foot pricing is the laziest way to run a pre-construction process, and leaning on it usually points to a builder who is not committing enough time to educating their clients. A rate ends the conversation. An itemized total starts one: you can see what the basement contributes, what the cabinetry contributes, and where to adjust without giving up the design intent.
Key Takeaways
-
A big share of your budget (excavation, foundation, roof, kitchen, servicing) is priced off the footprint and does not grow when storeys are added, so per-foot rates naturally fall as houses get bigger.
-
The economies run out around 4,000 to 5,000 square feet, where imported windows and doors, premium finishes, and structural complexity (the $50,000+ steel package on our Cliffside build) push the rate back up.
-
The denominator decides the number: $325 to $425 per foot on total finished space including the basement versus $400 to $550 above grade, for the same house.
-
A bungalow is the most expensive common shape per foot, carrying a full roof, full utilities, and a full kitchen on the smallest floor area.
-
Renovation per-foot pricing is close to meaningless: scope drives cost, and a single line like the kitchen can swing from $40,000 to $100,000.
-
Compare builders on itemized totals and what is included, never on the rate.
Frequently Asked Questions
What is a realistic cost per square foot to build a custom home in Toronto?
On real BVM projects, $325 to $425 per square foot calculated on total finished space including the basement, or $400 to $550 counted above grade only. Always ask which denominator a quote uses before comparing it to anything.
Why is my small renovation quoted at a higher rate than a full build?
Because some costs arrive whole regardless of job size, and a smaller project needs more margin to carry it against larger ones. This is normal across the industry. Budget for it rather than chasing the outlier quote that ignores it.
Should I compare builders using cost per square foot?
No. Compare itemized totals. Ask each builder what square footage they are measuring, what is excluded, and specifically where HST, permits, finish allowances, and site preparation sit. Most quote gaps shrink dramatically once both numbers are on the same baseline.
Get a Real Number for Your Project
If you are budgeting a build or a major renovation, start with our home building cost calculator or home addition cost calculator for a grounded starting range, then bring us your scope. We will price it as a total, itemized, with nothing hiding outside the number. Book a 30-minute consultation and we will walk you through what similar BVM projects have actually cost.
Related Reading:
-
-
Toronto Building Permit Timeline: What’s Really Eating Your Schedule
TLDR: Most Toronto homeowners think the permit timeline starts when drawings go to the City. It doesn’t. Between zoning reviews, OBC reviews, design coordination, and pre-construction scoping, you’re looking at a minimum of 6–10 months before shovels hit the ground — and that’s if everything lines up cleanly.
The Clock Starts the Day You Decide to Build
Here’s a conversation we have constantly. A homeowner calls in January and tells us they want to start building by September. Nine months sounds generous. Then we walk them through what has to happen between that first call and a permit in their hand — and the silence on the other end of the phone tells us everything.
The permitting process starts even before you submit anything to the City. For a major home addition or custom build in Toronto, the first real task is reviewing your property’s zoning. Not what you’d like to build — what the City actually allows you to build. That single step determines whether you’re on a straight path to a permit or whether you’ll need a Committee of Adjustment hearing first.
If you have to go to C of A, you’re adding a minimum of four months before the permit clock even starts ticking. That’s worth knowing on day one, not month six.
What the Timeline Actually Looks Like
The City of Toronto controls about 2–3 months of your total permit timeline. The rest happens entirely outside those walls, and that’s where most projects lose time they didn’t know they were spending.
Here’s the full sequence — the one that almost never gets explained upfront:
Topographic Survey and Zoning Review
Before anything goes to the City, you need a current topographic survey of your property. If yours is older than a few years, it won’t hold up. After that comes preliminary plan development — drawings detailed enough to enter the City’s zoning review queue. Toronto separated its zoning review from its Ontario Building Code (OBC) review, which means two distinct processes, two separate queues, and two independent cycles of back and forth with City examiners. Each review takes a minimum of four weeks — usually longer.
Design Coordination
Once zoning is clear, you’re into interior design, structural engineering, and mechanical design coordination. Done properly, this phase takes a minimum of two months. There’s a lot of back and forth with your architectural team to make sure the plans match exactly what you want. This isn’t stalling — it’s the phase that determines whether your permit submission is clean or whether it kicks off a three-round revision cycle with the City.
Pre-Construction Scoping
If you’re working with an experienced builder, this phase deserves real time. Our pre-construction process with clients typically runs 2–3 months. The goal is a budget that reflects actual construction costs, real subcontractor pricing, and a sensible project sequence — not a ballpark figure that leaves you exposed to change orders the moment conditions deviate from a best-case drawing.
Add it up: the minimum planning-to-permit timeline for a major home building project in Toronto is 6–10 months. Give yourself over 12 months and you will be in good shape 9 times out of 10.
The Rosedale File: A Cautionary Timeline
We are currently working on a project in Rosedale where the client started working with us at the beginning of 2025 for their home addition. He thought he’d be starting construction by the end of 2025. The permit was issued in May 2026 — almost 16 months after he first said “go.”
Rosedale has heritage overlay considerations and more City stakeholders than most Toronto neighbourhoods. There was nothing unusual about how the project was managed. That’s just what Rosedale requires. The same dynamic plays out in Lawrence Park, Cabbagetown, and parts of the Annex — anywhere heritage designations create additional layers of review.
The lesson isn’t “avoid heritage neighbourhoods.” It’s that the neighbourhood your property sits in is a material input to your permit timeline, and that variable rarely shows up in the builder’s initial estimate.
Where Timelines Actually Die
Most contractors will tell you the City takes forever. That’s not the full story.
The review and feedback cycle — both on zoning and OBC — is where timelines genuinely bleed out. Every time the City returns comments, your application goes to the bottom of the resubmission queue. It can never be reduced to zero; they always find something. What separates a 6-month permit process from a 12-month one is how quickly your team resolves those comments and how complete the submission was to begin with.
This is why who you work with matters more than most homeowners realize early in the process. A builder and architectural partner who work regularly with the Toronto Building Department — who the examiners know by name — know what each reviewer is looking for, what triggers revision requests, and how to package submissions that minimize cycles. You can’t game the City. But you can make it easy for them to say yes faster.
What Homeowners Get Wrong About Permit Cost Risk
There’s a persistent myth that a longer permit timeline automatically inflates the project budget. It doesn’t have to.
If you are planning far in advance and are conservatively estimating when you will have a permit in hand, it doesn’t affect the project budget whatsoever. The problem isn’t delay — it’s the mismatch between the delay and the planning assumptions around it.
We see the same pattern: homeowners plan to start construction the day the permit arrives. Contractors booked, temporary accommodations arranged, school year accounted for — all timed to the expected permit date. Then the permit comes in three months late, and every one of those plans falls apart in a cascade. Contractor availability evaporates. Material prices shift. The rushed scramble to start creates the exact pressure that generates expensive decisions.
Build in the room. The budget impact of a permit delay goes to near-zero when your planning has absorbed the possibility upfront.
The BVM Approach to Permit Uncertainty
We always try to play the realist when it comes to giving our clients realistic timelines. Most times we’re close. Sometimes even the City of Toronto can surprise us. When you deal with a building department, you’re dealing with real people — reviewers with caseloads, interpretation calls, and differing read on the same drawings. That introduces variability you can’t engineer away entirely.
What you can control is how you’re positioned when the permit lands.
We build six months of lead time into subcontractor scheduling after permit issuance. We price materials conservatively. We keep the contingency intact rather than raiding it for scope adds during design. That structure means a permit that takes two months longer than expected gets absorbed — not cascaded into a budget crisis or a mad dash to line up trades who’ve moved on to other projects.
Work with a good architectural design team and a builder the City knows and respects, and your chances of having unmet expectations about permits massively decreases.
Key Takeaways
-
The Toronto building permit timeline starts the day you decide to build, not the day you submit drawings
-
C of A adds a minimum of 4 months — staying within as-of-right zoning is the single biggest lever you have
-
The City controls about 2–3 months of your timeline; the rest is on your design team and builder
-
8–10 months from first meeting to permit in hand is realistic for Toronto home additions and custom builds
-
Heritage-adjacent neighbourhoods like Rosedale can take 16+ months — account for it before you start
-
Conservative planning neutralizes budget risk from permit delays; reactive planning amplifies it
-
Give yourself over 12 months of total planning runway and you’ll land on schedule 9 times out of 10
Frequently Asked Questions
Q: How long does a Toronto building permit take for a home addition?
A: In our experience, 8–10 months from when you start the design process is realistic. That covers zoning review, OBC review, design coordination, and pre-construction scoping. Straightforward projects in clear zoning can land in 6 months. Heritage overlays or projects needing Committee of Adjustment can push 12–16 months or beyond.
Q: What is the Committee of Adjustment and how do I know if I need it?
A: The Committee of Adjustment handles minor variance requests — situations where your proposed build slightly exceeds what the zoning bylaw permits as-of-right, whether that’s height, setbacks, lot coverage, or other metrics. If your project can’t be designed within those limits, C of A is required before a permit can be issued. That process adds a minimum of four months and has its own application fee, neighbour notification, and public hearing. Your first conversation with your architect or builder should answer whether C of A is likely on your specific lot.
Q: Can I actually speed up the Toronto permit process?
A: The biggest lever is avoiding C of A. After that: start earlier than you think you need to, and work with a builder and architectural team that the Building Department knows and regularly works with. A clean, complete submission with fewer gaps generates fewer revision cycles. That’s where experienced teams earn their weight.
Start the Conversation Before You Think You Need To
Permit timelines in Toronto are not complicated — they’re just longer than most people expect, and the variables that determine your specific timeline are worth understanding before you’re already three months in. If you’re thinking about a home addition, custom build, or major renovation in the GTA, talk to us early. We’ll give you a clear picture of what the process looks like for your property type, neighbourhood, and project scope. Book a call with our team directly at bvmcontracting.com.
Related Reading
-
-
What Does a Home Builder Actually Do?
TLDR: Most homeowners dramatically underestimate what a builder actually manages. It’s not just “hiring trades” — it’s procurement, coordination, quality control, risk mitigation, and daily project management running simultaneously across every phase of your build. Get the wrong builder, and you pay for it. Get the right one in early, and the whole project changes.
You’re Not Hiring One Person. You’re Hiring a System.
A lot of families walk into the custom home or addition process thinking they’re hiring someone who shows up on site and tells the framer what to do.
That’s not even close.
On any active project, our team is doing a dozen things most clients never see: confirming scope details with the mechanical contractor, re-reviewing structural drawings after a field condition changed, chasing down a lead time on windows that could push the drywaller by two weeks, reviewing a subcontractor invoice to make sure it reflects what was actually built.
That’s a Tuesday.
Day-to-day, a home builder is a team of people actively managing your project on site and behind the scenes to ensure it gets done on time and on budget — reducing risk wherever possible for your family. When a homeowner walks their finished house and it feels effortless, that’s not luck. That’s what a well-run build looks like from the inside.
What “Hiring Trades” Actually Means
Here’s what people picture: builder calls plumber, plumber shows up, job done.
Here’s what actually happens on a well-run project: the subs your builder brings in have been retained as a result of many successfully completed projects. They all speak the same language and understand each other’s schedules, nuances, and work patterns. It isn’t as simple as sending out plans to five different subcontractors and expecting them all to get back to you.
Many of the best home builders have a first and second team of subcontractors and vendors they’ve personally vetted and worked with. These trades are incentivized to do their best work because they want to keep getting consistent business from the builder. You’re not a one-off to them — you’re an extension of that ongoing relationship.
Proper coordination is mostly invisible. It’s the conversations that happen weeks before anyone sets foot on site: nailing down exactly what’s in scope, confirming timelines with each sub, making sure the electrician knows the framer needs two more days before they start their rough-in. When that sequencing is tight, projects stay on schedule. When it breaks down — even once — you feel it everywhere.
When Homeowners Try to Manage It Themselves
We’ve seen this play out on projects across Toronto — from the Annex to Leaside, the pattern is the same.
A client insists they want to bring in their cousin who does painting, or a trim carpenter they found through a neighbour. Sometimes the quality is fine. The timelines, almost never.
When a homeowner tries to manage subcontractors, they’re dealing with people and companies who don’t speak the same language — and who aren’t incentivized to prioritize a one-time client when their regular builder is calling with their seventh project this year. Almost every project where there were client-managed trades, there were timeline delays. Sometimes there were quality issues the homeowner had to live with permanently.
That’s not a knock on the trades themselves. It’s that good work requires coordination, and coordination requires trust built over time. A stranger to that system introduces friction. Friction costs money.
The one area where we do give clients flexibility: finishes. If someone has a tile supplier or a furniture maker they love, we can work with that — and we help our clients manage it through our vetted vendors so the process stays smooth.
How the Right Builder Protects Your Investment
Protection starts before anyone swings a hammer.
If you’re working with the right home builder, they’re pushing you to finalize scope items during the design phase — not after the permit is pulled. They’re procuring everything from demolition through to finishes before construction starts. They’re looking at your drawings and asking: is there a way to get you 90% of what you want at 80% of the cost?
The more planning you do upfront, the better the quality, the faster the project goes, and the fewer mistakes get made. Rework is one of the most expensive things that happens on a construction project. Rework from unclear scope is entirely preventable.
This is what procurement before construction actually means: by the time a shovel goes in the ground, every material, every sub, every lead time is mapped. There’s no stopping mid-project to figure out where the custom windows are. The job runs because the job was planned.
General Contractor vs. Home Builder: Is There a Real Distinction?
In the Toronto market, the terms are largely interchangeable — the business model is the same. The difference is specialization.
Some GCs specialize in commercial buildouts, restaurant renovations, or institutional work. Some focus on kitchens and bathrooms. We’re a general contractor whose specialization is home building: custom homes, additions, full-gut renovations. That focus means our subcontractor network, our pre-construction process, and our on-site management are all calibrated specifically for residential work. When someone says “home builder,” they’re signaling that residential expertise.
Ask any firm you’re considering: what percentage of your work is residential? What’s the most comparable project you’ve completed in the last 18 months?
What Most Homeowners Get Wrong
They bring in the builder too late.
We see this constantly. Families have gone through six months of design, have a full permit set in hand, and now they’re shopping for builders. The problem: they’re already married to the design. Every expensive decision has been made without any input from the people who know what things actually cost.
The earlier you align on project costs — and understand which decisions are the biggest levers on your budget — the higher the likelihood that you’ll actually execute the project. Projects where we’re brought in before the architect draws a single line have a materially better track record than projects that come to us permit-ready. The permit-ready ones often need to be redesigned anyway. Except now there are extra fees, months of delays, and a homeowner who was sold something they couldn’t actually afford.
Bring your builder into the design process before it starts. Not after. That’s when the real money decisions get made.
The BVM Approach: Built to Run Before It Starts
There’s a version of a builder that shows up when there’s a problem. That’s not us.
Before construction starts, we’ve locked scope, completed procurement, coordinated with all subs on timelines, and stress-tested the schedule for the things that always go sideways. That pre-construction process is our product as much as the finished house is.
During the build, our team is on site regularly and behind the scenes daily. We’re not managing by exception — we’re catching schedule risks before they become delays, and quality issues before they require rework. Active management before and during the project. That’s what actually protects your investment.
Key Takeaways
-
A home builder manages scope, procurement, coordination, quality, and risk — all at once, across every phase of your project
-
Your builder’s sub relationships are a real competitive asset: they guarantee priority service and consistent quality
-
Client-managed trades almost always create timeline delays, even when the work is good
-
Investment protection starts in pre-construction — the more you plan up front, the fewer surprises mid-build
-
Get your builder involved before design starts, not after you have a permit
-
Ask any builder: what’s your pre-construction process? If they can’t walk you through it specifically, that’s your answer
-
Fixed-price contracts beat cost-plus for homeowners who want certainty — know which one you’re signing before you commit
Frequently Asked Questions
Q: How do I know if a builder is actually managing my project or just collecting a fee?
A: Ask them to walk you through their pre-construction process in detail. A builder who can explain how they build a fully procured budget, how they coordinate trades before the project starts, and what their on-site management looks like — that builder is managing. If the answer is vague or generic, that tells you exactly what you need to know.
Q: Is a fixed-price contract better than cost-plus?
A: For most homeowners, yes. A fixed-price contract means the builder has done the work to lock down scope and pricing before you sign. Cost-plus shifts that risk onto you — every surprise in the field becomes your financial problem. Ask any builder you’re interviewing directly: are you fixed price or cost-plus?
Q: Can I save money by acting as my own general contractor and managing trades directly?
A: Some experienced homeowners pull it off. Most discover mid-project why builders charge what they charge. When you manage trades directly, you’re a one-time client with no leverage and no shared language. The coordination work that keeps a project on schedule doesn’t disappear — you absorb it personally.
Ready to Talk About Your Project?
If you’re in Toronto or the GTA and you’re trying to figure out whether you’re working with the right builder — or whether the process you’re in right now is going to end well — we’re happy to take a look. No pitch. Just an honest conversation about where your project stands and what it needs. Book a call with our team at bvmcontracting.com.
Related Reading:
-
-
Your Architect Doesn’t Know What Your House Will Cost
TLDR: Most Toronto homeowners hire an architect, fall in love with a design, then get a shock quote from a builder. The fix isn’t a better architect — it’s getting a builder in the room before the first drawing gets made. Here’s why the timing matters more than almost any other decision you’ll make on your project.
The Design You Fell In Love With Can’t Be Built
We’ve seen this happen more times than we can count. A family in the Beaches or Leaside hires an architect, spends six months going back and forth on drawings, and then — finally excited, finally ready — reaches out to builders for pricing.
The quotes come back. They’re not even close to budget.
Here’s the problem: it’s not because the architect did bad work. Most architects are talented. They design beautiful, thoughtful spaces. But unless they’ve spent years working alongside builders, they simply don’t have a real feel for what things cost to build in Toronto’s current market. Stone veneer on the front facade sounds elegant in a design meeting. When a subcontractor prices it out, it’s a different conversation.
“Getting a builder and a design team involved at the same time — and very early on — is the way to go,” is how we put it to clients when they ask why we push so hard on pre-construction involvement. It’s not a power grab. It’s math.
The Three Places Budgets Break Down
Size. Scope. Materials. Every time.
Size creep is the sneaky one. There’s a trend right now where homeowners want to maximize square footage — push the envelope on every dimension. That instinct makes sense emotionally. But every square foot of addition has a cost, and the bigger the structure gets, the more the existing home has to work to support it.
Here’s something most families planning a second storey addition don’t realize: even if you’re not planning to touch your finished basement, you’re probably going to end up doing work down there anyway. New structural loads, updated electrical, proper connections to existing infrastructure — it adds up fast. That’s not a contractor upselling you. That’s the reality of how houses are connected.
Scope creep in renovations is almost unavoidable. You open a wall, you find something. You change one thing, something adjacent has to change too. Projects in Toronto’s older housing stock — the Edwardian and Victorian semis in Leslieville, the postwar detached homes in Scarborough — almost always carry surprises behind the drywall.
Material selection is the one clients control most, and often the last one they get guidance on. Going ultra energy efficient across the board sounds responsible until you see the line items. One homeowner assumed their stone veneer was a minor visual upgrade. It wasn’t. If no one tells you early what a given selection actually costs to install, you can’t make an informed decision. That’s a failure of the pre-construction process, not a character flaw.
When to Bring in Your Builder (The Answer Might Surprise You)
Before you hire the architect. Or at the absolute latest, at the same time.
Not after drawings are done. Not when you’re ready to tender. Before.
We don’t require that families commit to construction with us to work with us in pre-construction. That’s a deliberate choice. Our pre-construction process lets homeowners and families get construction guidance — real cost reality, real input on what decisions will move the budget needle — without feeling locked in. The goal is to make sure that whatever gets designed can actually get built.
If your architectural partner isn’t open to collaborating with a builder during the design phase, treat that as a red flag. Not a maybe. A red flag. A firm that insists on designing in a vacuum is exposing you to real financial risk.
What Most Homeowners Don’t See Coming
Most clients don’t find out mid-project that they can’t afford the design. They find out after they’ve already spent tens of thousands of dollars on it — and emotionally attached to every detail.
It’s more than money at that point. It’s time. It’s months of back-and-forth with the design team. It’s the version of the kitchen they showed their spouse and kids. When a builder comes back and says the numbers don’t work, that’s not a simple pivot. It’s a painful reckoning.
And the timeline cost is real. When redesign happens late — when a permit is already in hand, when an engineer has already stamped the structural drawings — the cost of changing course multiplies. You’re not just paying to adjust a design. You’re paying to undo decisions that were already institutionalized.
Some families react by finding the cheapest builder quote they can. They talk themselves into believing the first builder was wrong, that someone else can do it for less. Sometimes they get partway through construction before realizing the original numbers were right all along. That’s a much worse place to be.
The BVM Approach: We Never Start a Design That Can’t Be Built
This is why we built The Constructible Design Co. (theconstructibledesign.co).
It’s a purpose-built sister brand to BVM Contracting — designed specifically to integrate builder-led guidance into the design and planning phase. The name says it all: the design has to be constructible. Every time. Not “constructible if everything goes perfectly.” Constructible within your actual budget, with real material costs and real subcontractor pricing baked in from the start.
The traditional design-build model gets this partly right. But many design-build firms still treat the “build” side as secondary to the “design” side. Our approach is different: the builder is a decision-making partner from the first conversation about what you want to create.
That means when you sit down to talk about your second storey addition in Etobicoke, your full gut renovation in Forest Hill, or your custom new build somewhere in the GTA — every major decision gets run through a construction cost filter in real time. Not at tender. Not after you’ve fallen in love with the drawings. Right then.
That’s what having a source of construction truth actually looks like.
What to Ask Before You Sign With an Architect
Four questions. Write these down before your first meeting.
How do you ensure the design fits within my budget? If the answer is vague — “we always try to stay mindful of cost” — that’s not a process. That’s a wish.
How do you integrate with my home builder during pre-construction? If they’ve never worked alongside a builder during design, or don’t think it’s necessary, pay attention to that.
How does your design process reduce risk during construction? This separates firms that have thought carefully about execution from firms that hand off drawings and consider their job done.
How do you handle mid-design pivots based on costing feedback, and do you charge redesign fees? The redesign fee question is especially telling. If they charge you every time a builder’s pricing requires an adjustment, you’re absorbing 100% of the financial risk of a process they’re controlling.
A firm that can’t answer these clearly isn’t necessarily bad at design. But they’re not the right partner for a homeowner who needs budget certainty.
Key Takeaways
-
Bring your builder in before or alongside your architect — not after drawings are complete
-
Size, scope, and materials are where budgets break down; all three can be managed with early builder involvement
-
The emotional cost of a design that blows your budget — after months of work and attachment — hits harder than the number on paper
-
Ask design firms directly how they handle costing feedback and redesign fees before you commit
-
The architect-then-tender model was built for commercial construction; for Toronto families with fixed budgets, it’s a high-risk path
-
The Constructible Design Co. exists specifically to solve this — builder-led design guidance before a single drawing is finalized
Frequently Asked Questions
Q: Does bringing in a builder before I have drawings cost extra?
A: Pre-construction doesn’t have to be expensive, and at BVM it doesn’t require a commitment to construction. The cost of getting it wrong — a design that comes back 40% over budget — almost always far exceeds what early involvement costs.
Q: Can my existing architect work with BVM, or do I have to switch firms?
A: We integrate into existing design processes regularly. If your architect is open to collaborating with a builder during design, we can work with them. If they’re not, that tells you something worth knowing before you’re deep into drawings.
Q: What does “constructible design” actually mean day-to-day?
A: It means every major design decision gets filtered through real construction costs before it’s locked in. Materials, square footage, structural choices — priced against your budget as decisions are made, not after they’ve been drawn and submitted for permits.
Ready to Talk About Your Project?
If you’re planning a renovation, addition, or custom home in the Toronto area — whether you haven’t hired an architect yet, you’re in the middle of design, or you’ve already got drawings and want a real construction cost check — our team at BVM Contracting is worth a conversation. Our pre-construction services don’t require a build commitment. The conversation is free. The budget clarity it gives you is hard to find anywhere else. Book a call with the team directly at bvmcontracting.com.
Related Reading:
-
-
Toronto Home Addition: The First 3 Steps Cost You Nothing
TLDR: Before you spend a dollar on drawings, deposits, or architectural fees, BVM Contracting walks you through three free steps — discovery, zoning review, and a preliminary budget. For most families, this process answers the three questions keeping them up at night: Can we afford it? Is it even allowed? How long will this take?
Most Homeowners Start in the Wrong Place
You’ve decided you need more space. Maybe a second storey. A rear addition. A way to fit a growing family into a house that hasn’t kept up.
So you start calling architects. Or you book a contractor consult that turns into a hard sell. Or you spend four hours on Google trying to figure out if what you want is even possible on your lot.
Here’s the thing: almost every family we work with comes to us before they’ve done any of that. Some of them haven’t fully figured out what they want to build yet — they just know they need more space. That’s exactly the right place to start.
The three biggest things keeping prospective home addition clients up at night are always the same. How much is this actually going to cost? Is what we want to do even possible? How quickly can we get a permit and get this done? Those are the questions we go after first — before anyone signs anything, before a single dollar changes hands.
Step 1: Discovery — Understanding Your Situation Better Than You Do
The first thing we do isn’t measure your house. It’s listen.
We use virtual consultations and our project management system to understand what’s actually driving the project. Are you adding a bedroom because a baby is on the way? Trying to get an aging parent onto the main floor? Looking to add value before selling? Each of those scenarios changes what we’d recommend — and whether a home addition is even the right answer.
We want to understand your pain points and problems as if they are our own.
That’s not a line we use to sound thoughtful. It’s how we screen for fit. If your timeline doesn’t match what’s realistic for a Toronto permitting process — and a lot of the time, it doesn’t — we say so upfront. We’d rather tell you that now than six months from now when you’re already into drawings.
This is where a lot of contractors skip ahead. They want to get to the quote. We want to understand why you’re building in the first place, because that shapes every decision that follows.
Step 2: Zoning Review — What’s Actually Allowed on Your Property
This is the step most homeowners don’t know exists. And it’s the one that protects you from spending $15,000+ on architectural drawings for a project the city won’t approve.
Once we understand what you want to build, we pull your property’s details from the City of Toronto’s zoning map and evaluate exactly what’s possible. Lot coverage limits, required setbacks, and — critically — whether your project needs a Committee of Adjustment approval or can go straight to a building permit.
That distinction matters. Going to C of A can add three to four months to your timeline, sometimes more. If you’re trying to be in a finished space by a specific date, that’s not an abstract number.
We also flag things most contractors never think to mention. Is there a significant tree on or near the property that could trigger a separate permit? Is the lot in a TRCA boundary? Heritage designation? Every one of those considerations adds time and complexity. We believe homeowners should know about them before they get too entrenched in a design process.
Honesty is the best policy for us. Always has been.
We can usually get a clear picture without a survey, unless there are unusual elevation changes or natural features we can’t assess remotely. Surveys are always smart before going deep into design — but we try to use every free resource available to give you maximum information before you’ve spent anything.
Step 3: Preliminary Scope and Budget — Real Numbers, No Drawings Required
This is the moment of truth. This is where you find out if what you want to build is actually within reach.
Using everything from the first two steps — your goals, your property’s zoning constraints, the likely permit path, and our detailed database of completed home addition and renovation projects across Toronto — we build a preliminary scope of work and budget. Without drawings.
We can do this because we ask a lot of questions, have a very accurate database of projects for almost every type of home addition project, and we take a lot of pride in building accurate budgets very early on in the home addition planning process.
These budgets consistently land within 10% of the final project cost. We build them conservatively — there’s room to work down rather than up, which our clients genuinely appreciate once they’ve heard what happened to someone else whose contractor went the other direction.
We present the preliminary scope directly to families. Line by line. What’s included, where the assumptions are, what still needs to be confirmed. No mystery numbers. No “starting at” ranges designed to get you in the door. You walk away from that conversation knowing what you’re actually looking at.
What Most Homeowners Get Wrong
Skipping these steps doesn’t save time. It costs it.
Some families try to accelerate the process — jumping straight to an architect, getting drawings done, putting deposits down with contractors — because they believe that moves things faster. What actually happens is assumptions pile up, expectations stop matching reality, and the whole thing comes apart or balloons in cost somewhere in the middle of a build.
The more time and money you spend in design, the less things will change in time and cost during construction. That’s the tradeoff nobody tells you about upfront.
Once families go through our process — and end up with a project that stays on budget from preliminary scope all the way to final invoice — they become some of our most vocal advocates. Not because of any magic. Because the right planning at the front end makes everything that follows predictable.
What We Caught at 79 Kimberley
A family came to us needing an extra bedroom. Second child on the way, due date circled on the calendar.
They were set on a home addition. More square footage, more room to grow. Completely reasonable.
We did the zoning review. The addition they had in mind would have triggered a Committee of Adjustment application. That pushes the permit timeline by months — months they didn’t have. And once we built out the preliminary scope and budget, the cost came in well above what they’d budgeted for.
So we pivoted.
An interior renovation could create the additional bedroom space they needed. No variance application. No C of A delay. A budget they were actually comfortable with. Same outcome for the family — more room for their new daughter — completely different path to get there.
If they’d gone to a contractor who skipped the zoning review and went straight to drawings, they’d have spent money and months on a plan that couldn’t deliver. Instead, they were in their finished space on time.
The BVM Approach: Education Before Everything
There are contractors who run intake calls as sales calls. You’ll recognize them — they’re trying to close, not advise.
That’s not how we work. A lot of companies out there have high-pressure salespeople taking these calls. We don’t sell — we educate and make sure there’s a genuine fit. We’re very solutions-focused, and that throws a lot of people off at first, because of the other personalities they deal with in the home building industry.
When families realize the first step is genuinely free — no obligation, no contract, no pressure — the conversation changes. They tell us what they’re actually worried about. We get the information we need to give honest advice, and they get clarity instead of a pitch.
That dynamic is the foundation the whole project gets built on.
Key Takeaways
-
The three questions every Toronto homeowner has — cost, feasibility, timing — can all be answered before you spend a dollar
-
A zoning review isn’t optional if you want to avoid surprises: C of A, TRCA, heritage, and tree constraints can each add months to a project
-
A well-built preliminary budget lands within 10% of final cost — without drawings
-
The 79 Kimberley project: a single zoning review saved a family from a C of A delay and an overbudget addition before their daughter arrived
-
More invested in design means fewer surprises in construction. Never skip the front end.
Frequently Asked Questions
Q: How much does a home addition cost in Toronto?
A: You’re spending hundreds of thousands of dollars any time you’re talking about a real home addition in Toronto. The exact number depends on type, size, and your property’s specific zoning path. That’s exactly why we built our home addition cost calculator — it gives a rough starting point before we’ve even talked. But nothing replaces the three-step process, which gives you a real number tailored to your actual project.
Q: How long does a Toronto home addition take?
A: Construction takes 4–7 months with BVM. But that’s not the full timeline. Permits in Toronto can take 6–12 months to secure, and if you need Committee of Adjustment approval, add another 3–4 months. You could be looking at 12–18 months total from first conversation to moving back in. Anyone quoting you a shorter timeline without knowing your property’s zoning is guessing.
Q: Do I need to hire an architect before talking to a contractor?
A: No — and coming to us first often saves you from commissioning drawings for something that can’t be approved. Our zoning review happens before design begins. Once we know what’s possible and what the budget range looks like, you can brief your designer with a realistic scope rather than starting over.
Ready to Talk About Your Project?
If you’re thinking about a home addition in Toronto, the most valuable thing you can do right now is have a real conversation about what’s actually possible on your property. No contract, no deposit, no pressure — just clarity on whether a home addition makes sense for your family, your timeline, and your budget.
Book a call with our team directly at bvmcontracting.com
Related Reading:
-
-
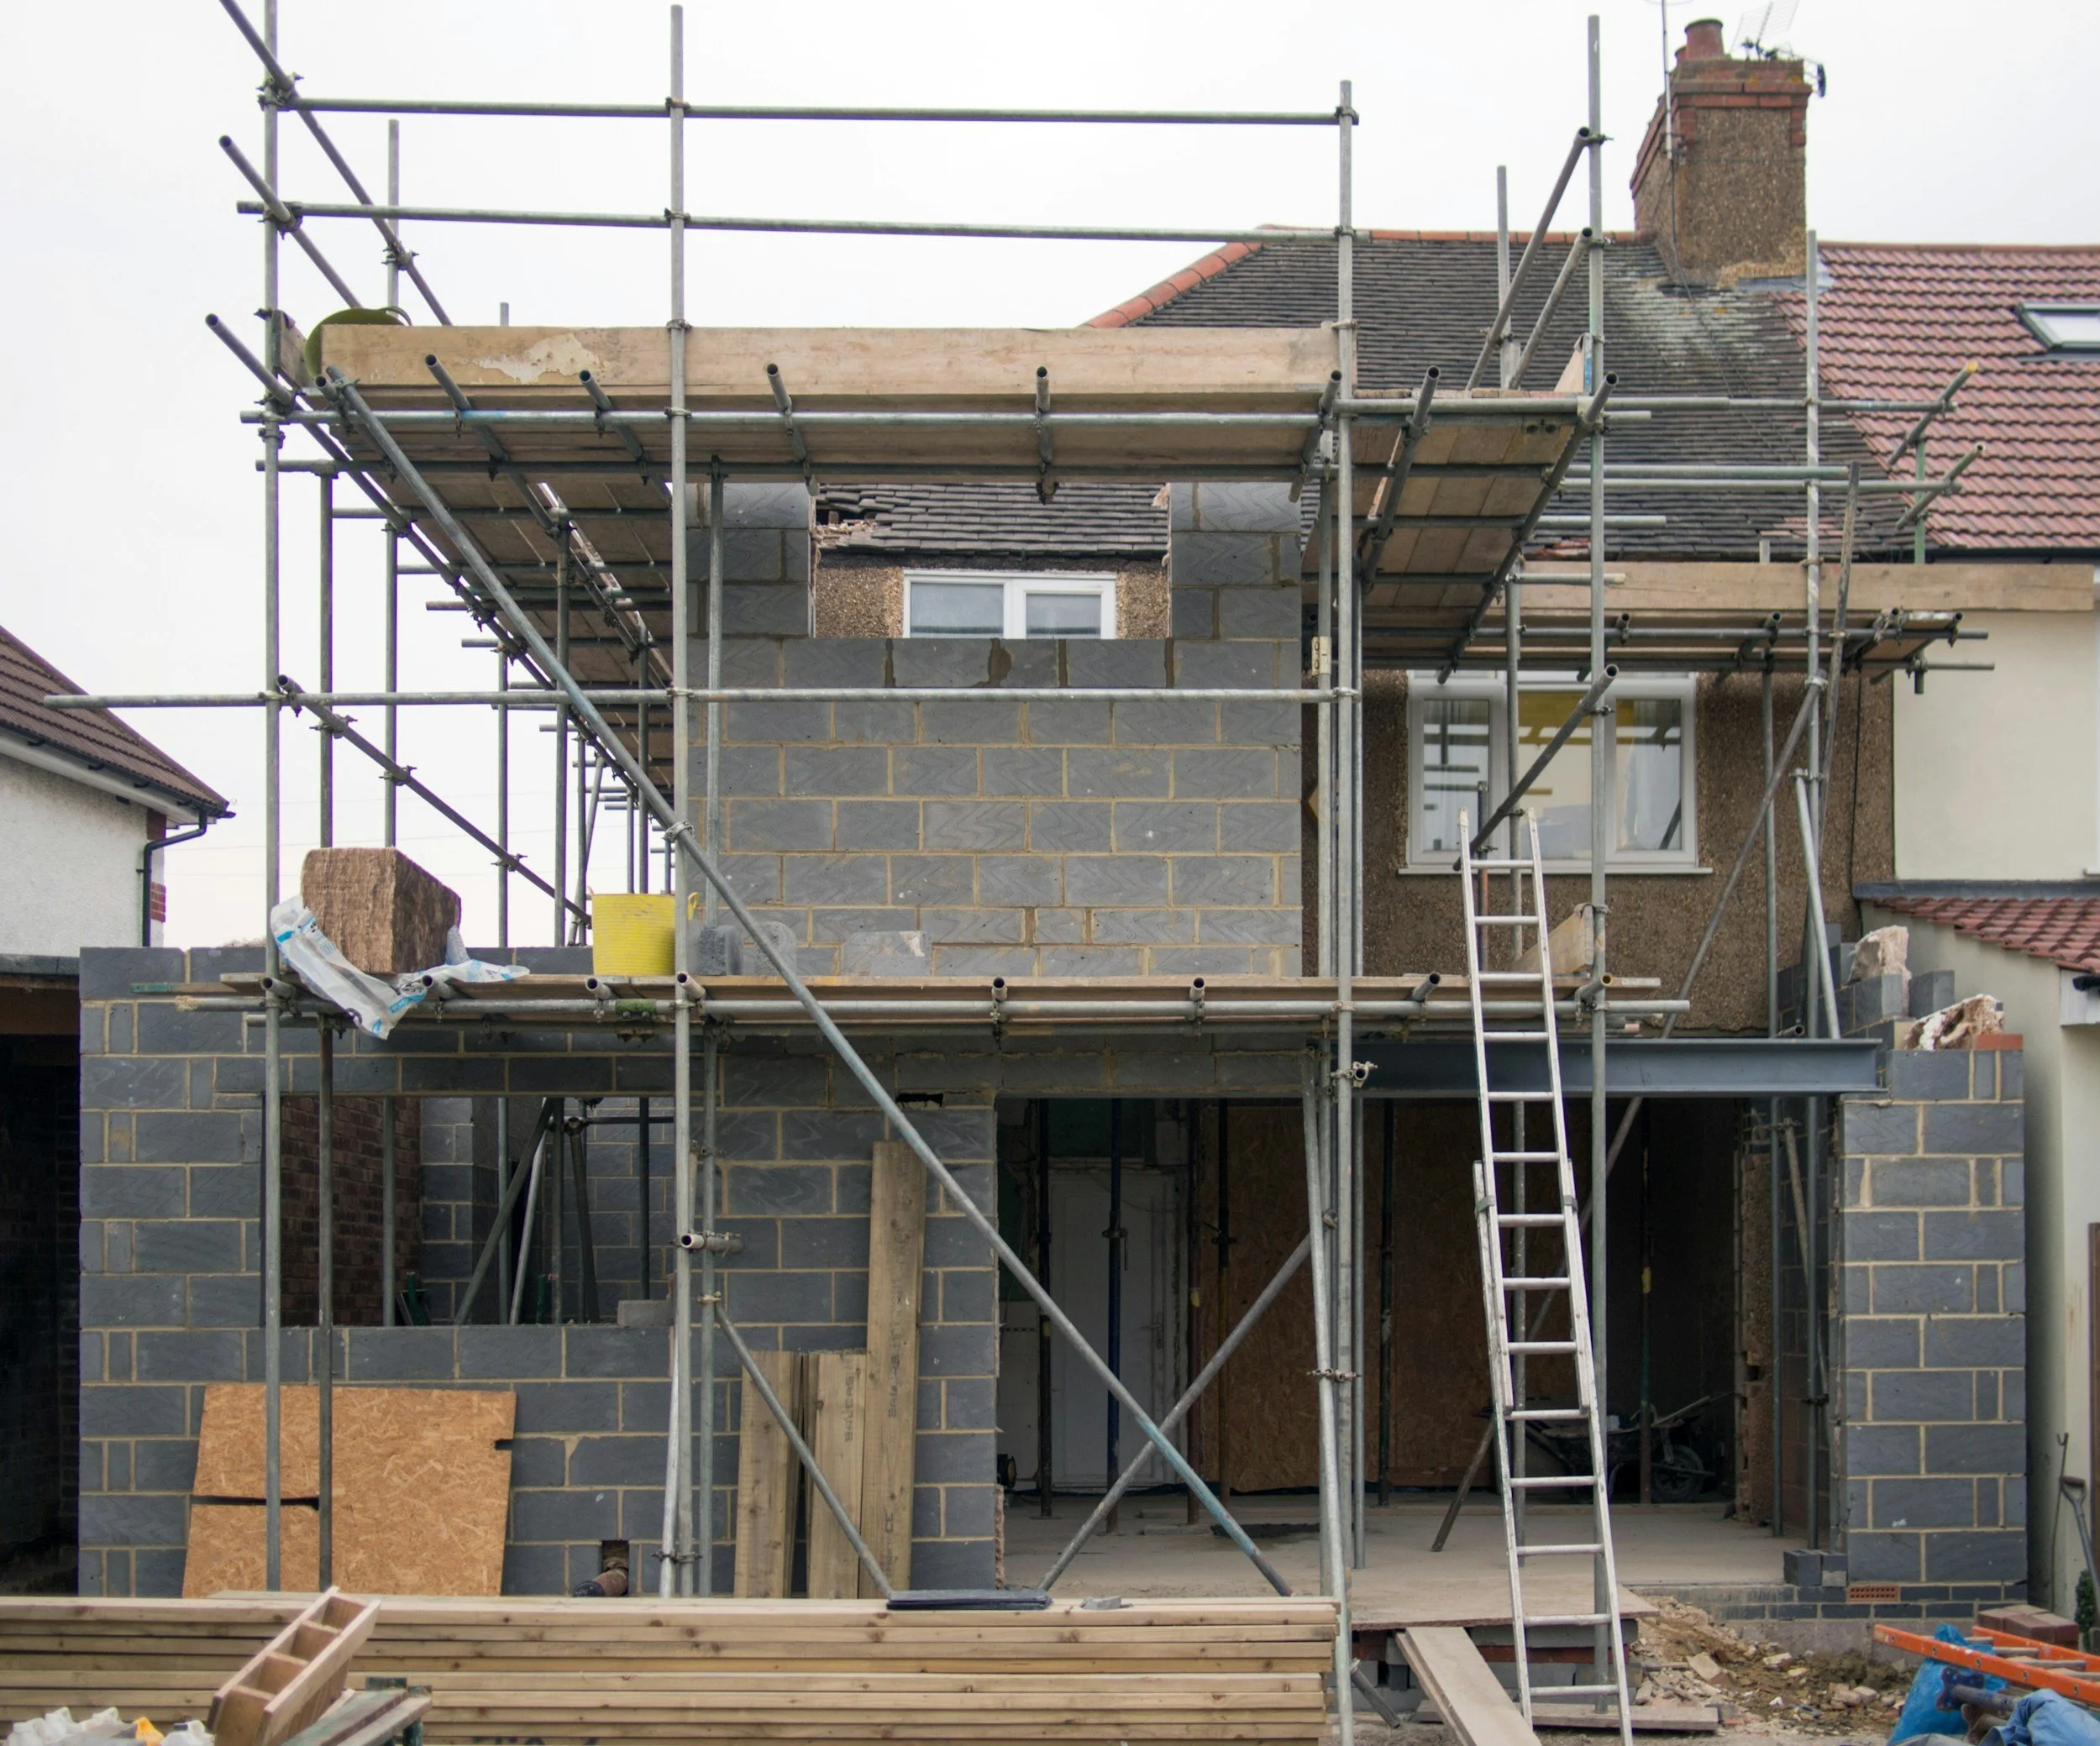
What Actually Happens During a Second Storey Addition in Toronto (Month by Month)
TLDR: A second storey addition in Toronto takes 6–7 months to build — but you’ll spend 12–18 months getting there. The planning and permit process is where most families get blindsided. Here’s the real timeline, broken into two phases: everything before construction starts, and everything after.
Why Two Timelines Exist (And Why Most Contractors Only Tell You About One)
When Toronto families call us about a second storey addition, they usually come in with one question: “How long will it take?”
The honest answer isn’t one number. It’s two.
Phase one — planning, design, zoning, permits — runs anywhere from 12 to 18 months before a single nail gets driven. Phase two — active construction — is 6 to 7 months. That means from the day you start seriously thinking about adding a second storey to the day you move back in, you’re looking at 18 to 24 months minimum. Sometimes more.
Any contractor who tells you otherwise hasn’t done enough of them.
Our first conversation with a family usually happens before they have drawings. Before they’ve spoken to an architect. Often before they’ve settled on a budget. That’s actually the right time to call — because what you can build, how long it will take, and what it will cost are all shaped by decisions made before any design work starts.
The Planning Phase: Month -12 to Month 0
Here’s what 12 months of pre-construction actually looks like, broken down by phase.
Months -12 to -10: Zoning, financing, and feasibility
Before your architect draws a single line, you need to know what the city will allow on your lot. Lot coverage limits, setback requirements, maximum building height — all of it is set by zoning. We walk families through this first. There’s no point designing a second storey addition that the city won’t approve.
This is also when financing gets sorted. A second storey addition in Toronto isn’t a home depot weekend project. Know what you’re working with before you start spending on design fees.
Months -10 to -6: City of Toronto zoning approvals
If your project falls within standard zoning, you’re submitting for a zoning certificate. If it doesn’t — if you need to go bigger or different than what’s permitted on your lot — you’re applying for variances through the Committee of Adjustment (C of A).
Committee of Adjustment adds 4–6 months to the front end of your project. We tell every family this in the first conversation, because you can figure out very early in the design process whether your project will require it. Delaying that conversation doesn’t make the requirement go away. It just wastes time.
Properties in ravine protection areas, tree protection zones, or heritage districts add another layer entirely. We recently started a project in Rosedale where the timeline to get a permit was substantially delayed because of the involvement of Heritage Toronto and the NRRA. That’s not exceptional for Rosedale. It’s just the reality of building in a heritage district, and families need to know it going in.
Months -6 to -3: Structural, mechanical, and interior design coordination
Once zoning is locked, the coordination starts. Structural engineers, HVAC designers, and interior designers all need to be working off the same set of plans. This phase typically takes 6 to 10 weeks. It’s where design gets filtered through real construction costs — and where we help clients make trade-offs that actually work before the budget is finalized.
Months -3 to 0: Permit submission, budget lock, and procurement start
The last stretch before construction: finalize interior selections, lock the budget, submit plans for permit. We need 6–8 weeks for permit review after submission. Then a final buffer before shovels go in.
This is also when finishes need to be selected. Countertops, tile, flooring, fixtures — anything with a lead time. We push every family on this point because it’s the single largest timeline killer once construction is underway.
The Construction Phase: Month 0 to Month 7
Seven months. Here’s how they break down.
Month 0–1: Demo, foundation, and pre-framing
Demolition happens first. Any work to the basement or foundation — underpinning, structural reinforcement — gets done in this phase. More complex foundation work can push this to 6 weeks. Plan for it if you know it’s coming.
Month 1–2: Framing, roofing, windows, and exterior
The addition takes shape. The second storey gets framed, the roof goes on, windows go in. By end of month two, you have a weather-tight envelope. That’s the goal of this phase — get it closed in before anything else.
Month 2–3: Plumbing, mechanical, and electrical rough-ins
Each trade sequences in order: plumber and mechanical team first, electrical after. They’re slightly staggered because each trade needs clear access and their systems need to be set before the next comes in. Rush this sequence and you’re redoing work. Complex exterior finishes may still be ongoing through this phase as well.
Month 3–4: Insulation, stairs, and drywall
Once rough-in inspections pass, finishing work begins. Insulation goes in, then stair install, then drywall. Nine times out of ten, by end of month four the drywall is up and we’re transitioning to finishes.
Month 4–5: Trim carpentry, paint, tile, flooring — in that order
The finishing sequence surprises a lot of clients. Trim carpentry first, painting second, tile third, flooring last.
The logic: painters need unobstructed access to walls and doors without finished floors in the way. Tile needs to go in before flooring so nothing gets chipped. Flooring is the last thing installed because it needs to be protected. Trim takes 3–7 days depending on scope. Paint, 5–10 days. Tile, 5–8 days. Flooring, 3–7 days depending on type and square footage.
Month 5–6: Kitchens, bathrooms, fixtures, and mechanical finishes
Once flooring is down, everything comes together. Kitchen cabinetry gets set up and adjusted on site. Plumbing fixtures go into bathrooms. Shower glass gets fabricated and installed. Pot lights, vents, and electrical finishes complete the mechanical work. Custom millwork deliveries can affect this phase — if you’ve ordered custom cabinetry, the lead time needs to be accounted for long before this month arrives.
Month 6–7: Final inspection, punchlist, and occupancy
We walk the finished space with the client and build a punchlist — every item that needs attention before move-in. We get through the list, pass the final inspection, and hand over the space.
We always recommend completing the punchlist before you move in. Working around furniture slows the trades down and ends up costing everyone time. Get it done clean, then move.
After the final invoice is paid, our 2-year warranty activates — covering drywall pops, paint touch-ups, and mechanical, electrical, or plumbing issues that surface in the first two years.
Real Numbers: The 66 Inwood Avenue Project in East York
Numbers make timelines real. At 66 Inwood Avenue in East York, we added 1,400 square feet to an existing 700 square foot bungalow — more than doubling the home’s size. The permitting process stretched longer than it should have because the project had to be put on hold partway through. Under normal conditions, 12 months of planning would have been more than sufficient — they didn’t need to go through C of A.
Once construction started in May 2025, we had the family moved back in by November 2025. Seven months, on the nose. The family had actually kept their rental unit into early 2026 because they assumed we wouldn’t finish in time.
We delivered, and had them home well before Christmas.
Of those 7 months, about 2.5 were dedicated entirely to finishing work. The rest was structure, envelope, and rough-ins. That’s a normal split for a project of that scale.
What Most Homeowners Get Wrong About the Toronto Addition Timeline
You are going to spend more time planning your second storey addition than you will building it. That’s not a complaint — it’s just how it works when you do it properly.
Most families are genuinely surprised to hear we can complete a home addition in 6–7 months. They’ve heard 7–12 from other builders. The difference isn’t that we cut corners — it’s that we coordinate everything before we break ground. Trades scheduled. Materials ordered. Inspections anticipated. When the sequence is locked in before month zero, construction moves.
On the permitting side, the City of Toronto’s building department is slow. That’s not a secret. But the time you spend in planning isn’t wasted — it’s the period where you prevent the budget blowouts that come from designing first and costing later.
The three things that reliably blow up construction timelines:
-
Missing finishes. Tile on backorder. Countertop lead times nobody accounted for. Flooring sitting in a warehouse across the country. Select everything before construction starts. Every item with a lead time. Don’t gamble with your schedule.
-
Poor sequencing. Trades stepping on each other. Rough-ins not ready when inspection is scheduled. Structural questions surfacing mid-build that should have been resolved in pre-construction. This isn’t a construction problem — it’s a planning failure.
-
Cash flow problems. Any stalled project in your neighbourhood is stalled because of one of three things: it wasn’t priced right, the finishes aren’t in, or the finances aren’t in good shape. Usually it’s a combination. The most efficient home additions are the ones that have been priced properly, scheduled around material and resource availability, and are running with healthy project cash flow.
The BVM Approach: Living Arrangements During a Second Storey Addition
Our policy on this is non-negotiable: families do not live in their homes during active construction. Full stop.
Other companies allow this to make the project appear more affordable on paper. We’ve had clients share their experience living through these types of projects with other teams. Every time: a disaster. Construction dust in every room. No functional kitchen for weeks. Noise every morning. Safety risks for kids. The money saved on temporary housing isn’t worth what it costs in stress, schedule disruption, and quality.
If the numbers only work if you stay in the house during construction, the project isn’t ready to go. Budget in the additional living expenses — a rental, family, extended stay — or wait until you can. The Inwood Avenue family had a rental lined up and ended up not needing as much of it as they thought.
That’s the best-case outcome. Plan for it.
Key Takeaways
-
Give yourself at least 12 months of planning before construction starts — more if your project requires Committee of Adjustment approval
-
C of A adds 4–6 months to the front end; find out if you need it in the first design conversation, not the last
-
Ravine protection, tree protection zones, and heritage districts each add review time — know your property’s constraints before finalizing any design
-
Select your finishes before construction starts — this is the single biggest timeline factor within your control on the construction side
-
A well-run second storey addition in Toronto finishes in 6–7 months; if your builder is estimating 10–12, ask specifically why
-
Families do not live in the house during construction — budget for temporary accommodations as part of the project cost
-
The 2-year warranty starts after the final invoice is paid, not on a calendar date
Frequently Asked Questions
Q: How long does it take to get a building permit for a second storey addition in Toronto?
A: After you submit complete plans, permit review typically takes 6–8 weeks. But the full process — from initial design through to permit in hand — takes 6 to 12 months, because the design, structural coordination, and zoning steps all happen before submission. If your project needs Committee of Adjustment approval for variances, add another 4–6 months. Start earlier than you think you need to.
Q: Do I need to move out during a second storey addition in Toronto?
A: With BVM Contracting, yes — always. We don’t allow families to live on site during active construction. Budget in the additional living expenses for the project or don’t do it at all. If that makes the project unaffordable, that’s important information to have before you start.
Q: What does a second storey addition cost in Toronto?
A: Costs vary significantly based on square footage, finish level, structural complexity, and whether you need a Committee of Adjustment application. What we can tell you: get real numbers early. Projects that blow their budgets almost always had unrealistic numbers going in — not surprises that came from the field.
Ready to Talk About Your Second Storey Addition?
If you’re at the stage where you’re trying to figure out whether a second storey addition makes sense — what you can actually build, what it’ll realistically cost, how long the whole process takes — that’s exactly when to call us. Not after you’ve spent $15,000 on architectural drawings for something that won’t get approved.
We work with Toronto families through every phase of the process, from that very first conversation to final inspection. Book a call with our team directly at bvmcontracting.com.
Related Reading:
-
-
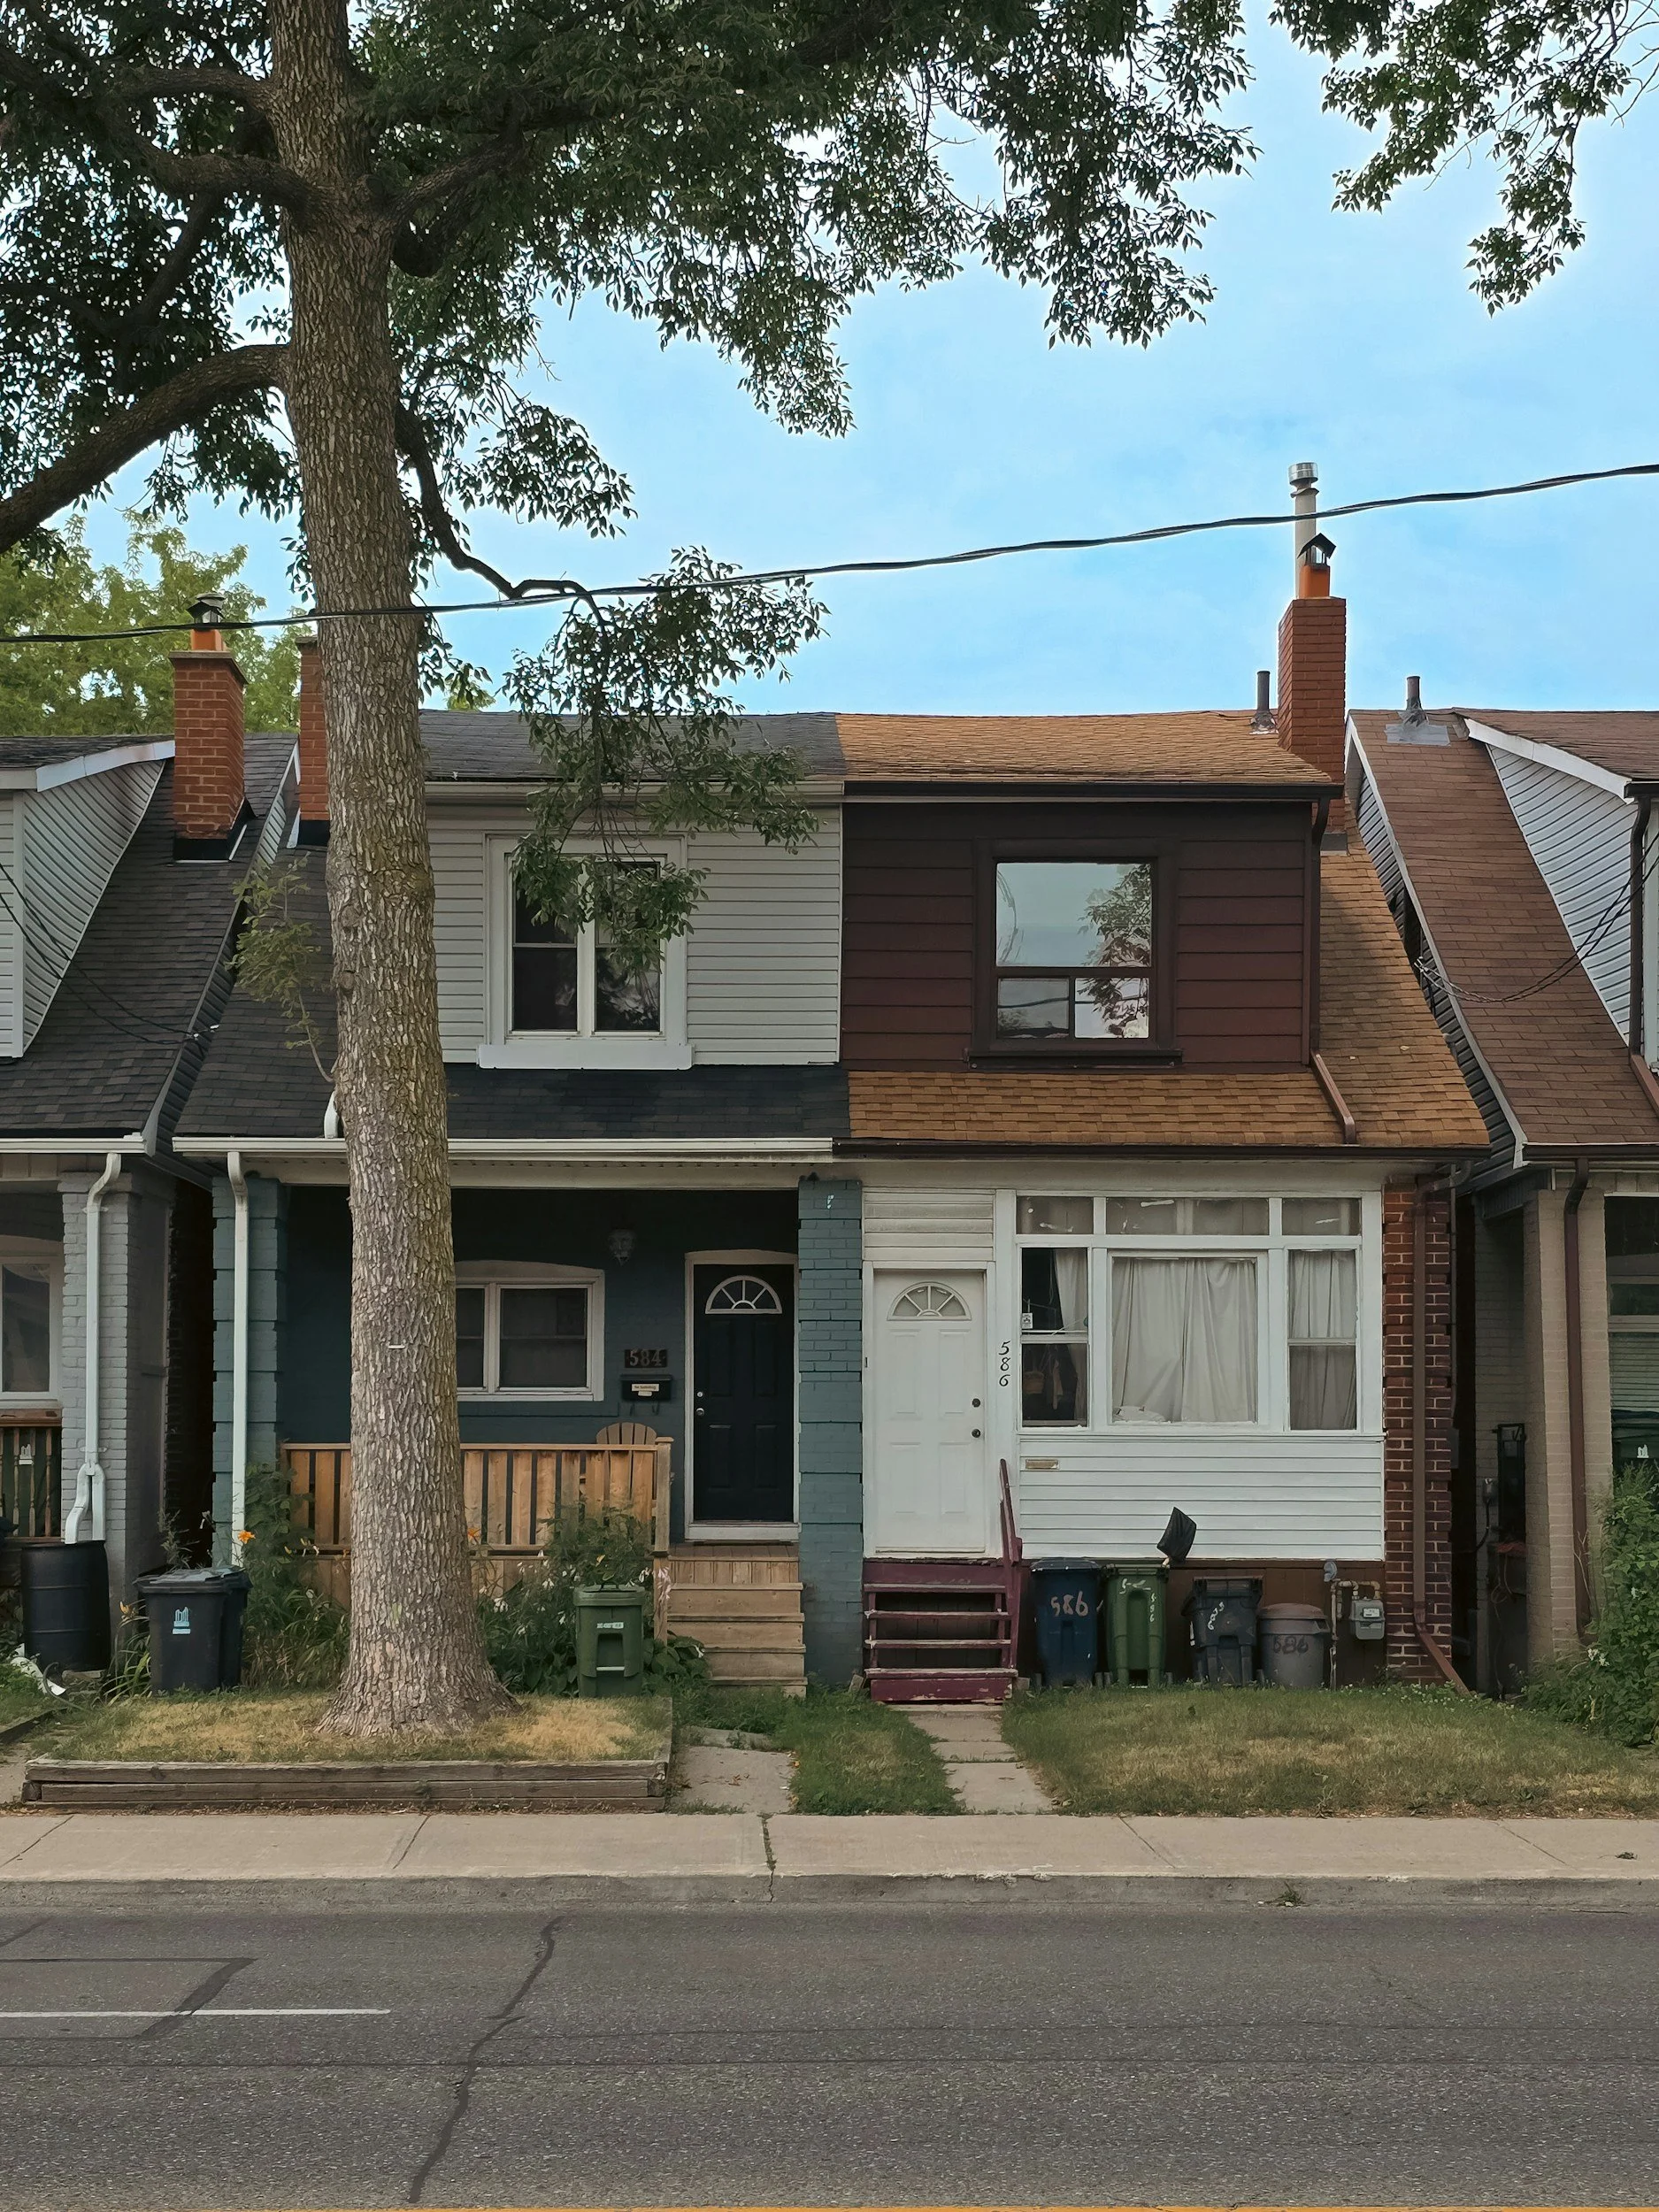
Renovate or Move? The Math Toronto Homeowners Keep Getting Wrong
TLDR: Most Toronto families compare the sticker price of a renovation to the listing price of a new house — and miss $100,000 or more in moving costs they’ll never see again. The real decision is more nuanced than that, and getting it right requires numbers from both a builder and your bank, not just your realtor.
The Conversation We Have Every Week
A family outgrows their house. Second kid. Parent moving in. Two years of working from home in a space that was never designed for it. Whatever the trigger, the first instinct is usually to scroll listings. The second — once they see what comparable homes cost in their neighbourhood — is to call us.
We’ve sat across from a lot of families at this exact crossroads. And the one thing almost all of them have in common: they’re working with incomplete math. Not because they’re not sharp. Because the people they’ve been talking to have only given them half the picture.
What Moving Actually Costs in Toronto
This is where the gap starts. When families compare renovating to moving, they typically subtract their current home’s value from a target home’s price and treat that as “the cost of moving.” It’s not close.
The real cost of moving in Toronto looks more like this:
Realtor commission: Typically 4–5% on the sale. On a $1.5M home, that’s $60,000–$75,000 before you’ve even started shopping.
Land transfer tax — twice over: Toronto is one of the only cities in Canada where you pay both provincial and municipal LTT. On a $1.8M purchase, you’re looking at roughly $57,000. First-time buyers get a rebate. Everybody else pays it in full.
Legal fees, moving costs, and bridge financing: Add another $10,000–$20,000 depending on your situation and timing.
Carrying costs during the gap: If there’s any overlap between your sale and purchase — and in Toronto’s market there often is — you’re covering costs to live somewhere in between.
All of that money practically disappears overnight when the transaction closes. It doesn’t go toward your new home. It doesn’t build equity. It’s gone. Some families look at that $100,000–$150,000 and decide they’d rather put it toward making their existing home work better for them — and on many projects, that’s exactly what it does.
What Adding On Actually Costs
Now for the other column.
Adding 600–800 square feet to a modest single-level Toronto home typically runs $400,000–$750,000. That range is wide for a reason. It moves based on whether the basement is being touched, what finishes are selected, how much interior work the addition triggers, and whether the structure or site creates complications.
That’s a real number, and we put it in front of clients early. Not after they’re excited about the design. Before.
What’s also worth knowing: not every space problem needs an addition. We recently started a project at 79 Kimberley where a smart interior renovation solved the whole problem — adding the extra bedroom our clients needed ahead of their newborn without touching the footprint. Sometimes unlocking what’s already there is all you need.
The families who tend to be best positioned for an addition are the ones who’ve built meaningful equity over the past several years and whose income has grown with it. The construction cost has to make sense against what they have to work with, and against what staying in that specific neighbourhood is actually worth to them.
What Most Homeowners Get Wrong
The single biggest mistake? Running this math with only one type of advisor.
They don’t reach out to a home builder and only talk to real estate agents. Realtors are good at their job. But they get paid when you sell — and that’s not a criticism, it’s just the system they operate in. Their incentives point in one direction.
Good builders aren’t built that way. For us, we’ve gotten plenty of business from telling people to move, when we could have told them to stay and build. We’ve built a reputation for giving you the truth, even if that means guiding you away from us. We do this because we know that if you’re the right fit, you’ll come back — and they often do. The family at 62 Birchmount is a good example: they decided to sell after talking through the numbers with us, and when they needed renovation work done at their new place, they came back. That’s what telling the truth earns.
You need someone who can give you real construction costs — not a rough ballpark, a scoped number. Without that, you’re making a six-figure decision with half the data.
The Toronto Factors That Change Everything
A few things make this decision uniquely complicated in this city that people from other markets don’t fully appreciate.
School zones. This comes up in almost every family conversation involving kids of school age or close to it. Leaving the right zone can feel like giving something up that no listing price fully compensates for — and that sits entirely outside the financial model. It belongs in the decision anyway.
Neighbourhood attachment. We ask every family how fluid they are geographically. If the answer is “wherever, as long as we get more space” — that’s a strong signal they’re going to move. The more particular you are about where you live, the fewer options the market can actually offer you. When the Swansea house isn’t available and the High Park prices have moved, and you’re not willing to go to Etobicoke — suddenly improving what you have looks a lot more reasonable.
And the real estate market doesn’t run on your timeline. “Buying up” assumes you can find the right home, in the right neighbourhood, at a price that works — and that it becomes available when you need it. A home addition is disruptive, but it gives you more control over the outcome than the listing market does.
Where We’d Honestly Tell You to Sell
Some additions just don’t pencil out. That’s the truth, and we say it.
If a family needs significant additional square footage and their current lot can’t support it — due to setbacks, existing structure, or site conditions — the cost can climb past the point where staying makes financial sense. If someone is genuinely open to any neighbourhood in the GTA and has no deep roots, moving can absolutely be the right answer.
The tipping point is different on every project. That’s why we don’t give one-size-fits-all answers. What we do is work through the actual numbers on both sides — real construction costs in one column, real moving costs in the other — so the decision is grounded in data, not whoever you talked to last.
The Emotional Layer Nobody Actually Says Out Loud
The finances narrow the field. Emotion usually makes the final call.
The more attached you are to your home, your street, your neighbourhood — the more likely you are to find a way to make a renovation or addition work, even when the spreadsheet is borderline. Sometimes, if you look at a project purely from a financial lens, it doesn’t fully justify itself. But when you factor in what it actually costs to leave a school zone, a community, the street where your kids have their friends — it really muddys the decision-making matrix.
That weight is real and it deserves to be in the conversation. What we try to do is fill in the construction costing so the emotional side of the decision doesn’t have to carry the whole load. When you actually know the numbers on both sides, the right answer tends to get clearer on its own.
Key Takeaways
-
Moving in Toronto costs $100,000–$150,000+ in fees that build zero equity — this never shows up in the listing-vs-listing comparison
-
A 600–800 sq ft home addition typically costs $400,000–$750,000 in Toronto, depending on scope
-
Not every space problem requires an addition — a well-planned interior reno can solve it for less
-
Talk to a builder and a realtor. You need both sides of the number, not just one
-
How flexible you are geographically is probably the single biggest predictor of whether you’ll stay or go
-
School zones and neighbourhood roots are legitimate factors — they belong in the decision alongside the financials
-
The best outcome for your family comes from having complete data on both sides, not a pitch from one advisor
Frequently Asked Questions
Q: Is it cheaper to renovate or move in Toronto right now?
A: Depends on the scope — but when you account for land transfer tax, realtor commission, legal fees, and carrying costs, moving typically costs $100,000–$150,000 that goes nowhere. A targeted renovation or addition can cost less and keeps your equity intact. The comparison is never as clean as renovation price vs. new home price.
Q: How much does a home addition cost in Toronto?
A: For a 600–800 sq ft addition on a single-level home, budget $400,000–$750,000. That range moves based on the complexity of the project, whether the basement is part of the scope, and your finish level. We scope each project individually — there’s no accurate number without looking at your specific property.
Q: Should I talk to a realtor or a builder first?
A: Both — but know what each one can actually tell you. A realtor tells you what’s selling. A builder tells you what it costs to improve what you already have. You need both numbers to make a real decision. If you only have one side of the equation, you’re filling in the other half with guesswork.
Ready to Run the Numbers on Your Home?
If you’re seriously weighing an addition against a move, we’re happy to walk through the costs with you — no pitch, no pressure. Just real construction numbers alongside the real cost of moving, so you can make a decision that actually fits your family. Book a call with the BVM team at bvmcontracting.com.
Related Reading:
-
-
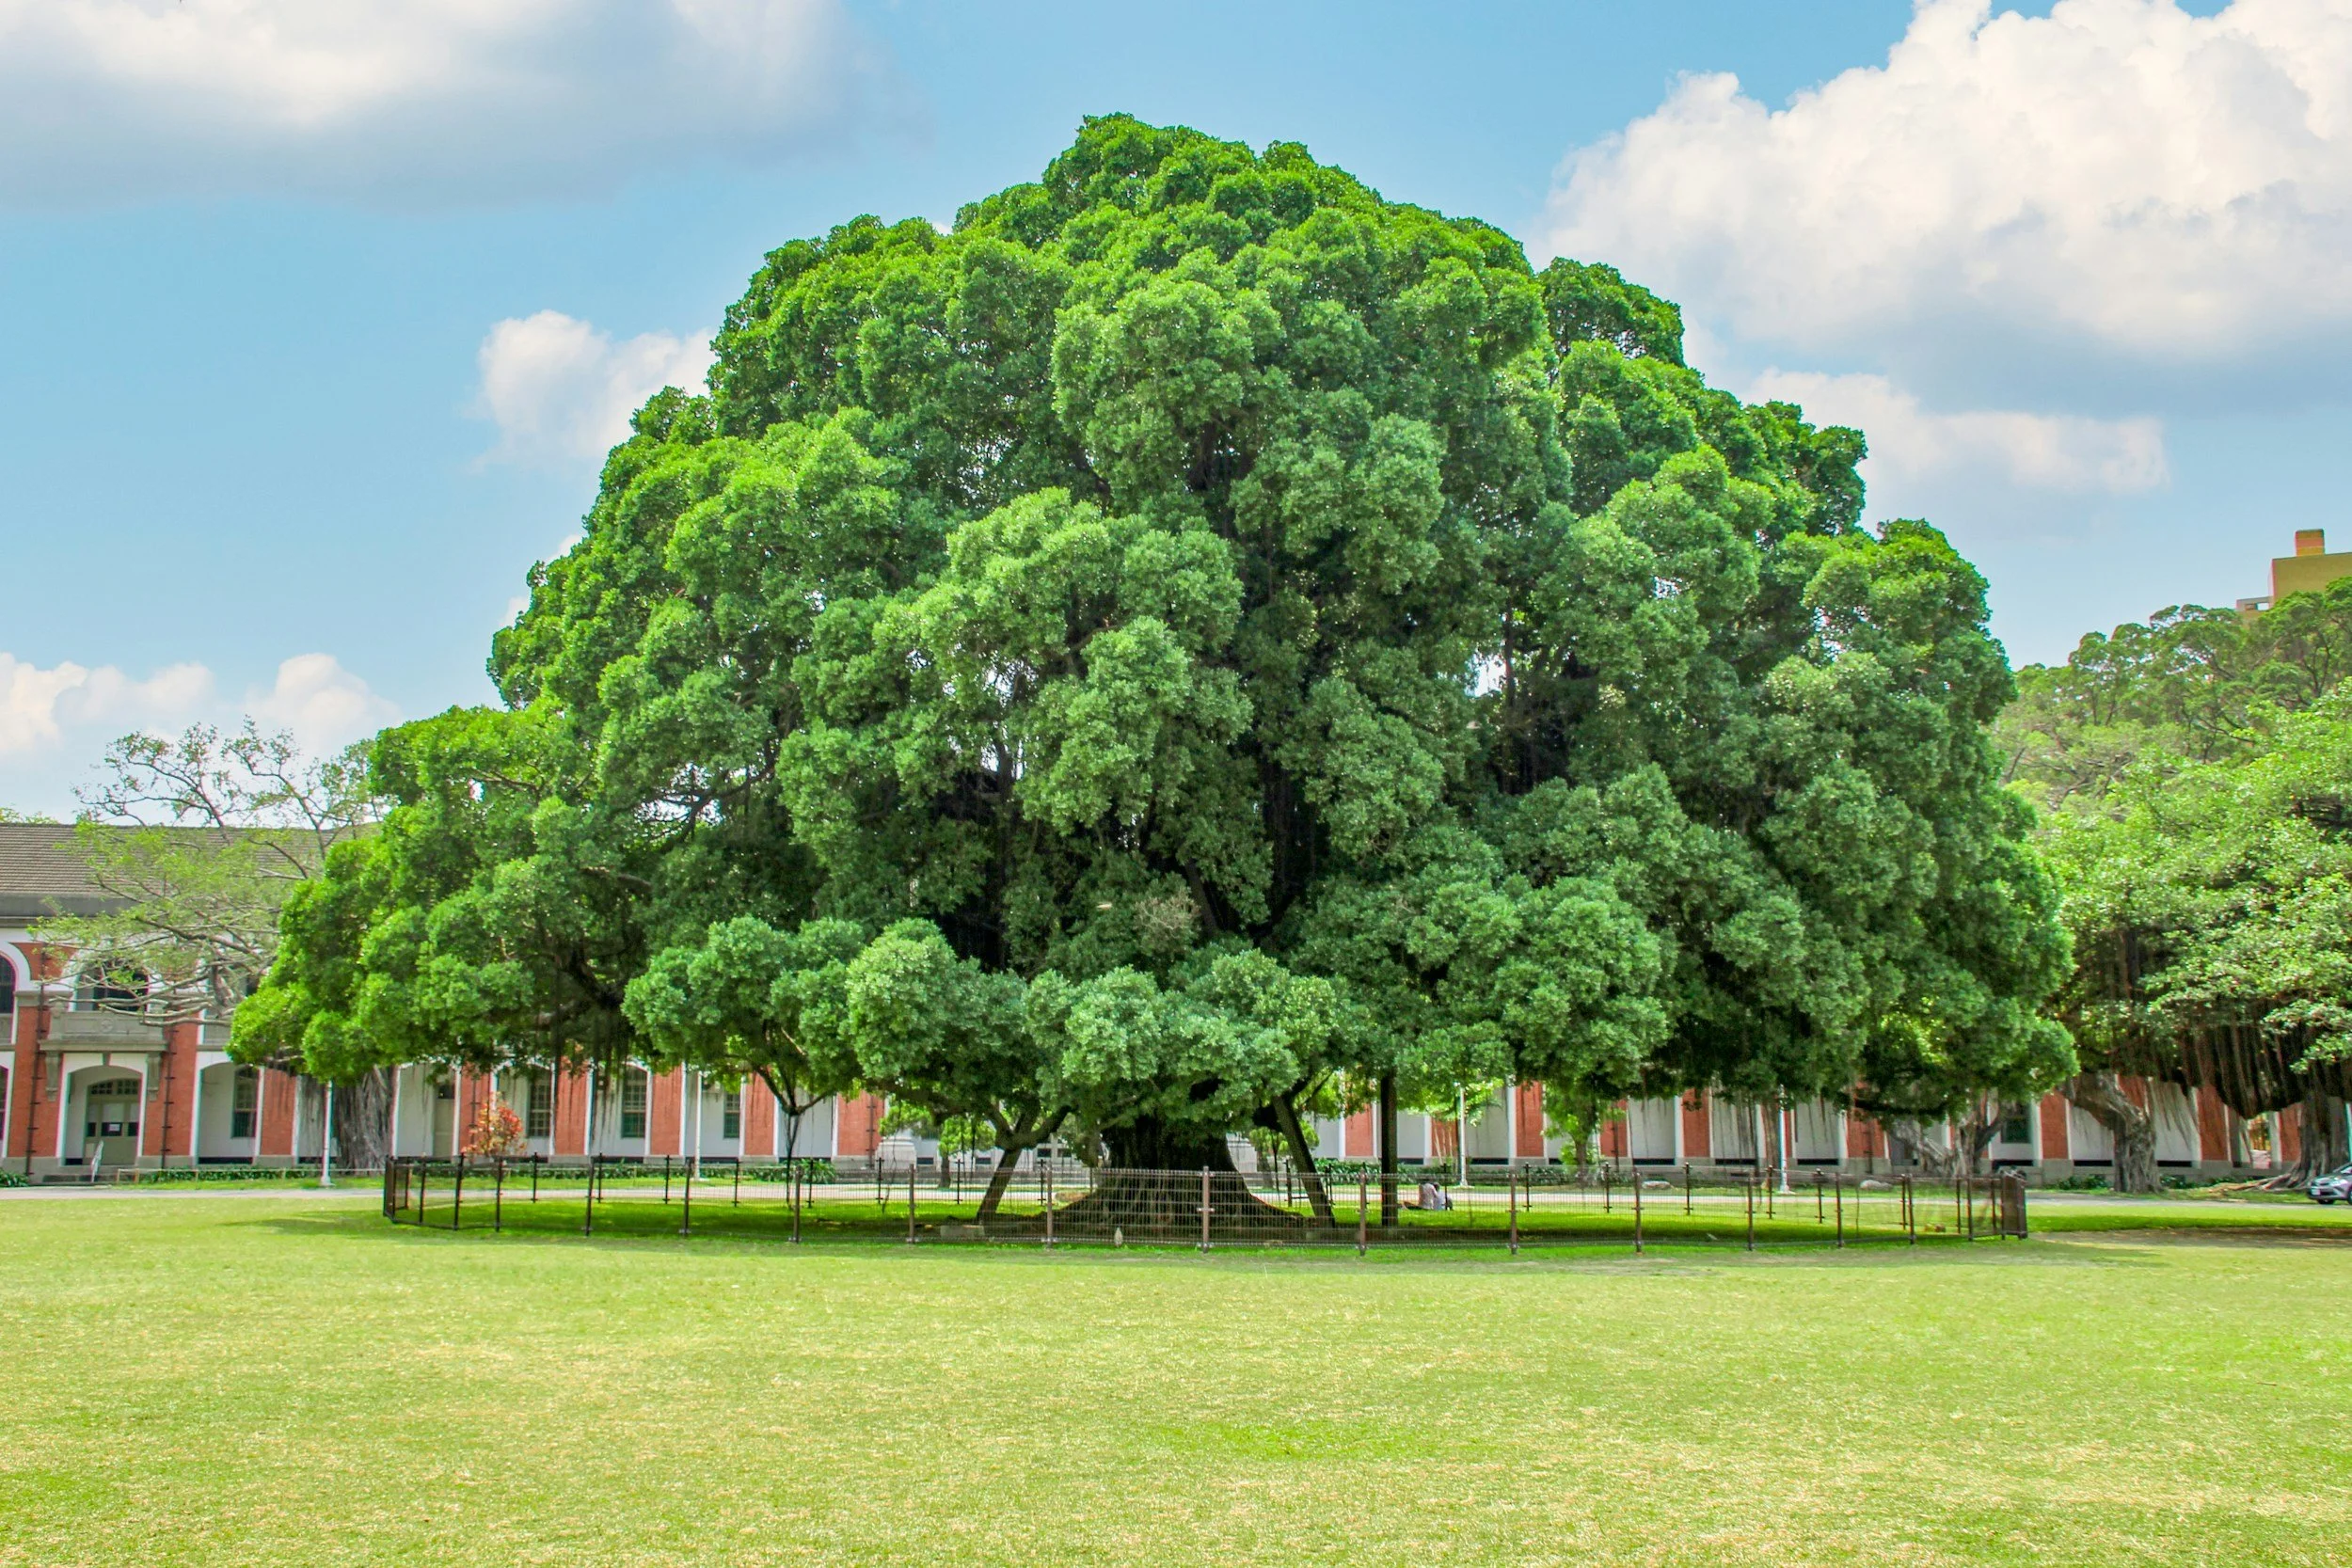
Tree Protection Considerations for Toronto Custom Homes
TLDR:
-
Any tree 30cm+ in diameter on your Toronto property is bylaw-protected — and construction within its Tree Protection Zone (TPZ) triggers permits, arborist reports, and potential fines up to $100,000 per tree
-
Garden suites and ADUs are hit hardest by tree protection requirements, followed by additions, then custom homes. Ravine-protected properties have stricter TPZ rules.
-
The single biggest mistake we see: homeowners ignoring tree protection until it’s too late, turning a manageable process into a budget-crushing nightmare
-
Get a survey and bring in an arborist before you even start designing — not after
Key Takeaways About Toronto Tree Protection
-
Trees ≥30cm DBH on private property, all street trees, and any tree in a ravine-protected area are regulated under Toronto’s Tree Protection By-law (Chapter 813)
-
Fines range from $500 to $100,000 per tree — plus replacement planting at 120% of cost, security deposits, and potential stop-work orders
-
TPZ distances scale with trunk diameter: a 70cm tree requires a 4.2m protected radius — that’s an 8.4m-wide no-go zone around the trunk
-
The arborist should be your first call, not your last — ideally before design even starts
-
Proper tree protection on site means plywood hoarding or snow fencing installed to City specs, inspected by Urban Forestry before any work begins
-
Every dollar spent on early planning saves multiples in avoided fines, replanting costs, and project delays
Here’s What Most Homeowners Don’t Realize About Trees and Construction in Toronto
We’ve had homeowners call us mid-project, panicked, because Urban Forestry just showed up and told them to stop work. Their contractor never mentioned tree protection. Their architect didn’t flag the 80-year-old maple sitting 3 metres from the proposed foundation. And now they’re staring down fines, mandatory replanting, security deposits, and a construction timeline that just got blown apart.
We see this constantly. And the worst part? It’s preventable every single time.
Toronto does not mess around with tree protection. The City doesn’t care if you didn’t know about the bylaws. They don’t care if your contractor forgot. If you damage or remove a protected tree without a permit, you’re liable — and the penalties are steep.
Our team has dealt with tree protection requirements on projects all over Toronto and the GTA — from the Beaches to Scarborough to Rosedale. We’ve seen what it looks like when a project handles it properly from day one, and we’ve inherited the mess when it gets ignored. This article is everything we wish someone had told our clients before they started planning.
What Triggers Tree Protection Requirements in Toronto
Not every tree on your property is regulated. But more are than you’d expect.
Under Toronto’s Tree Protection By-law (Municipal Code Chapter 813), here’s what’s protected:
Private Trees ≥30cm in Diameter (DBH)
Any tree on private property with a trunk diameter of 30 centimetres or more — measured at 1.4 metres above ground (called “Diameter at Breast Height” or DBH) — is protected. Any activity that could injure or remove that tree requires a permit. This includes trees on your neighbour’s property if their roots or canopy extend into your construction zone.
All Street Trees — Any Size
Every tree on a City street is protected, regardless of size. That boulevard tree between the sidewalk and the road? Protected. The one growing in the front yard close to the property line? Possibly City-owned, and definitely protected. If you’re not sure, call 311 or check your survey.
Trees in Ravine and Natural Feature Protected Areas
If your property falls within a designated ravine or natural feature area, every tree — regardless of size — is protected. Grade changes, excavation, dumping, and construction are all prohibited without a permit.
The Bottom Line: If you’re planning any construction — custom home, addition, garden suite, even a new driveway — and there’s a mature tree anywhere near the work zone, assume it’s protected until proven otherwise. Get it measured.
The Real Cost of Ignoring Tree Protection
This is the section that usually makes homeowners go quiet. The fines are not symbolic. They’re designed to hurt.
Fines: $500 to $100,000 Per Tree
Under Section 813-29 of the Municipal Code, a person convicted of a tree protection offence is liable to a minimum fine of $500 and a maximum fine of $100,000 per tree — plus a potential special fine of $100,000. That’s per tree. If your project impacts three protected trees without permits, you’re looking at up to $300,000 in fines before you’ve even talked about remediation.
Replacement Planting at 120% of Cost
If a tree needs to be removed and replanting isn’t physically possible on site, the City can require cash-in-lieu payment equal to 120 percent of the cost of replanting and maintaining the trees for two years (Section 813-20). Depending on the species and size, this can run into tens of thousands of dollars.
Security Deposits
Urban Forestry can require tree protection guarantee deposits and tree planting security deposits to ensure compliance. These are held for a minimum of two years after construction or planting is complete, and they’re only released after inspection confirms the trees are healthy and in vigorous growth. If the trees don’t survive? You’re replacing them on your dime.
Stop-Work Orders
The General Manager of Parks, Forestry and Recreation has the authority to stop any work causing unauthorized injury to protected trees. That means your entire project grinds to a halt until the issue is resolved. We’ve seen this add weeks — sometimes months — to a construction timeline.
The Bottom Line: The replanting is usually the largest cost if you need to do it, then the cash-in-lieu and security deposits aren’t cheap either. Every property is different, but if you’re dealing with any of these, you’ll be spending thousands — if not tens of thousands — depending on how many trees are affected and whether you’re in a ravine-protected area.
Tree Protection Zone (TPZ) Sizing: The Numbers You Need to Know
The Tree Protection Zone is the area around a tree that must remain completely undisturbed during construction. No excavation. No equipment. No material storage. No foot traffic. Nothing.
TPZ size is based on trunk diameter (DBH), measured against the City of Toronto’s specifications. The required protection distance is whichever is greater — the calculated distance based on trunk diameter, or the dripline (the area beneath the outermost branch tips).
Why this matters in practice: A 70cm-diameter tree requires a 4.2-metre protected radius in every direction from the trunk. That’s an 8.4-metre-wide zone you cannot touch. On a typical 30- or 40-foot-wide Toronto lot, that single tree can consume a massive portion of your buildable area.
And here’s what catches people off guard: for ravine-protected areas, that same 70cm tree demands an 8.4-metre radius — a 16.8-metre-wide protection zone. That can effectively eliminate large portions of your property from any construction activity.
The Bottom Line: If you have any mature trees on your property, you better hope they’re not located centrally, because the TPZs can get massive depending on the size of the trees. This is exactly why we tell every client: get a survey done first, measure the trees, and understand the TPZ implications before you fall in love with a design that can’t be built.
How Tree Protection Differs: Custom Homes vs. Additions vs. Garden Suites
Not all projects face the same level of tree protection headaches. Here’s how it breaks down from our experience:
Garden Suites and ADUs — The Worst Hit
Garden suites are affected the most. These structures go in the backyard, which is exactly where mature trees tend to live. The City’s official position is clear: laneway and garden suites should not result in the removal of a healthy bylaw-protected tree. Where a design requires tree injury or removal, the City may refuse the tree permit entirely. That’s not a negotiation — that’s a hard stop on your project.
If you’re planning a garden suite and your backyard has established trees, you need to know this before you invest a dollar in design.
Rear, Side, and Front Additions — Second in Line
Additions are the next most impacted, particularly rear extensions. The reason is simple: you’re expanding the building footprint into areas where trees and their root systems already exist. Side additions on narrow Toronto lots can also create conflicts with boundary trees or trees on neighbouring properties — which adds another layer of complexity because you may need consent from adjacent owners.
Custom Homes — More Flexibility, But Not Immunity
Custom homes tend to have the most flexibility because you’re designing from scratch. You can position the foundation, orient the building, and plan the site layout with tree protection in mind from day one. That said, if you’re building on a lot with significant existing trees, especially in established Toronto neighbourhoods, the TPZ constraints will still shape your design in meaningful ways.
The Bottom Line: The project type dictates your exposure level, but none of them are exempt. The earlier you understand the tree situation, the more options you have.
The Tree Protection Permit Process: Step by Step
Here’s what the actual process looks like when you need a tree protection permit in Toronto:
Step 1: Get an Updated Survey
An updated property survey is usually required to identify the actual species, locations, and diameters of trees on your property and adjacent properties. This is your foundation document — everything else builds on it.
Step 2: Hire a Consulting Arborist
The arborist assesses the trees, measures DBH, determines Tree Protection Zones, evaluates tree health and condition, and prepares the arborist report. This report must meet City of Toronto standards and is required for permit applications.
Step 3: Develop the Tree Protection Plan
Working with your arborist and builder, develop a Tree Protection Plan showing all existing trees within the area of consideration (the site disturbance area plus 6 metres beyond for private trees, or 12 metres for ravine-protected areas). The plan must show proposed TPZ barriers, construction access routes, material storage areas, and any proposed tree injury or removal.
Step 4: Submit the Permit Application
Submit the completed application with arborist report, tree protection plan, landscaping and replanting plan (if trees are being removed), and applicable fees to the appropriate Urban Forestry district office.
Step 5: City Review and Conditions
Urban Forestry reviews the application and may require revisions to your construction plan or design. If a permit is issued, it comes with conditions — including specific tree protection measures, replacement planting requirements, and potentially security deposits.
Step 6: Install Tree Protection Before Any Site Work
Tree protection barriers must be installed before any site activity — including demolition. Urban Forestry must inspect and approve the protection measures before construction begins.
Step 7: Maintain Protection Throughout Construction
Tree protection barriers must remain in place and in good condition throughout the entire project. They cannot be altered, moved, or removed without Urban Forestry authorization.
Step 8: Final Inspection and Deposit Release
After construction and landscaping are complete, Urban Forestry inspects the site. Security deposits are only released after the trees are confirmed healthy and all permit conditions are satisfied — often two years after planting.
What Proper Tree Protection Actually Looks Like on Site
Tree protection on a construction site isn’t complicated, but it has to be done to City specifications. Here’s what it involves:
Plywood Hoarding
The standard is 2.4-metre (8-foot) high plywood hoarding, minimum 19mm (¾”) thick, installed at the TPZ boundary. This is the most common barrier for residential projects.
Snow Fencing
On City road allowances where visibility matters, 1.2-metre (4-foot) high orange plastic web snow fencing on a wood frame is used. On residential sites, snow fencing is sometimes combined with plywood hoarding depending on the situation and Urban Forestry’s requirements.
Signage
Tree Protection Zone signs — minimum 40cm x 60cm — must be mounted on all sides of the barrier. These signs notify everyone on site that no construction activity, grade changes, material storage, or vehicle access is permitted within the TPZ.
Sediment Control
Sediment control fencing must be installed per Ontario Provincial Standards to prevent runoff into tree root zones. This is especially critical on sloped properties and in ravine-protected areas.
The hoarding is pretty simple in concept — snow fencing and/or plywood wrapped around the tree based on the outlined TPZ radius shown on the site plan. But “simple” doesn’t mean “optional.” We’ve seen projects where contractors treated the hoarding as a suggestion rather than a requirement, and it cost the homeowner dearly.
Real Project Story: 62 Birchmount Road — When Tree Protection Becomes a Nightmare
We recently completed a rear extension project at 62 Birchmount Road in Scarborough, and it’s a perfect example of what happens when tree protection gets addressed too late in the process.
The project included a rear extension and a garage build. The construction itself was straightforward — but dealing with tree protection and Urban Forestry later into the process? Nightmare. There’s no other word for it.
We had to cut down and replant trees. The back-and-forth with Urban Forestry was painful and time-consuming. And the biggest impact? It delayed the start of the garage build that was part of the project scope. What should have been a smooth sequence of construction phases turned into a stop-and-start ordeal because the tree protection requirements weren’t addressed early enough.
This is the kind of project where bringing in the arborist at the very beginning — before design, before permits, before anyone picks up a shovel — would have changed everything. The trees could have been accounted for in the design. The applications could have been submitted proactively. The timeline could have stayed intact.
Instead, it became a reactive scramble that added cost, added time, and added stress for everyone involved — especially the homeowners.
The Bottom Line: The 62 Birchmount project is a case study in why tree protection can’t be an afterthought. It has to be sequenced into the project from the very first conversation.
When to Bring in the Arborist (Hint: Before You Think You Need One)
This is the single most important piece of advice in this entire article:
Bring in the arborist before the design process even starts.
Not during design. Not after design. Before.
Here’s why: when we bring in the arborist early, they evaluate the trees and provide feedback about how to structure and submit the necessary applications to the City. Sometimes these conversations guide our homeowners in an entirely different direction — one that doesn’t involve as much involvement from Urban Forestry. That can save tens of thousands of dollars and months of timeline.
The second-best time? When design starts. At that point, the arborist can understand what’s being designed and set up the application for success. They can flag conflicts before they become problems, suggest design modifications that avoid TPZ encroachments, and ensure the permit application has the best chance of approval.
The worst time? After you’ve finalized your design, applied for building permits, and started construction. At that point, your options are limited, your costs are higher, and your timeline is at risk.
The Bottom Line: The arborist is not an afterthought — they’re a planning tool. Invest in their expertise early, and it pays for itself ten times over.
BVM’s Approach to Tree Protection
At BVM Contracting, we don’t treat tree protection as a separate line item that gets dealt with “when we get to it.” It’s woven into how we plan every project from the first site visit:
Early Assessment: We flag potential tree protection issues during our initial site evaluation, before design begins. If the property has significant trees, we recommend getting an arborist involved immediately.
Design Integration: We work with architects and arborists to ensure the construction design accounts for TPZ constraints. This means fewer surprises, fewer permit complications, and fewer budget overruns.
Proactive Permitting: We help coordinate the tree protection permit application alongside building permits, so the two processes run in parallel rather than in sequence. This keeps the project timeline tight.
On-Site Compliance: Our crews understand tree protection requirements. Hoarding goes up before any work starts. TPZ boundaries are respected throughout construction. Urban Forestry inspections are coordinated proactively.
Sequencing Expertise: We know how to sequence construction phases around tree protection requirements — including coordinating with Urban Forestry for inspections, managing security deposits, and ensuring replacement planting is done to specification.
The difference between a builder who gets tree protection and one who doesn’t shows up in your bank account and your calendar. We’ve lived through both scenarios on project sites across Toronto, and trust us — proactive always wins.
Homeowner Action Plan: What to Do in the Early Planning Stage
If you’re in the early stages of planning a custom home, addition, or garden suite in Toronto, here’s your action plan:
1. Invest in an Updated Property Survey
Get a current survey that shows property lines, existing structures, and — critically — the location and approximate size of all trees on your property and adjacent properties. This is your starting point for everything.
2. Get an Arborist Assessment Early
Hire a consulting arborist to evaluate your trees before design begins. They’ll measure diameters, identify species, assess health, determine TPZ sizes, and flag potential issues with your planned construction.
3. Check if You’re in a Ravine-Protected Area
Use the City of Toronto’s Ravine and Natural Feature Protection By-law Map (available at toronto.ca) to determine if your property falls within a designated area. If it does, protection requirements are significantly more stringent.
4. Design With Trees in Mind
Share the arborist’s findings with your architect or designer before they start drawing. A design that avoids TPZ encroachments will save you time, money, and frustration compared to one that requires permits for tree injury.
5. Budget for Tree Protection
Include tree protection costs in your project budget from the start: arborist fees, permit application fees, hoarding installation, potential replacement planting, and possible security deposits. It’s better to budget for it and not need it than to be surprised mid-project.
6. Choose a Builder Who Understands the Process
Work with a builder who has direct experience navigating Toronto’s tree protection requirements. This isn’t a skill every contractor has. Ask about their experience with Urban Forestry, their approach to sequencing permits, and how they handle TPZ constraints on site.
Think about the trees. Because if you don’t, you’re risking a large and unavoidable expense that might take you over budget if you aren’t careful. The best way to understand the risks is by investing in a survey, getting an arborist to review early in the planning process, and working with a knowledgeable home builder who can help you sequence everything properly.
FAQs
How do I know if a tree on my property is protected?
Measure the trunk circumference at 1.4 metres above ground and divide by 3.14 to get the diameter (DBH). If it’s 30cm or more, the tree is protected under the Private Tree By-law. All street trees are protected regardless of size. If your property is in a ravine-protected area, all trees are protected regardless of size.
Can the City refuse my tree removal permit?
Yes. The General Manager can refuse permits where trees are healthy, where environmentally sensitive areas won’t be adequately protected, or where the application doesn’t meet bylaw criteria. For garden suites specifically, the City may refuse permits that would result in removing a healthy protected tree.
What happens if my contractor damages a protected tree without a permit?
You — the property owner — are liable. Fines range from $500 to $100,000 per tree. The City can issue stop-work orders, require remediation, and hold you responsible for replacement planting at 120% of cost. Your contractor’s mistake becomes your financial problem.
Ready to Build Smart?
If you’re planning a custom home, addition, or garden suite in Toronto and want to make sure tree protection doesn’t derail your project, we’d love to talk. We’ll help you understand your property’s specific tree situation, navigate the permit process, and build a plan that keeps your project on time and on budget.
Book a free consultation: Schedule a call with BVM Contracting
External Resource: City of Toronto — When to Apply for a Tree or Ravine Permit
-
-
Provisional Sums and Allowances: The Contract Traps Costing Toronto Homeowners Thousands
TLDR: Most Toronto homeowners sign renovation contracts without realizing the numbers inside them are still estimates. Provisional sums and allowances are legitimate tools — but in the wrong hands, they become the mechanism for budget blowouts. Here’s how to spot the trap and what to demand before you sign anything.
The Contract That Looked Fine on Paper
Here’s a story we’ve seen play out more times than we’d like.
A Toronto homeowner gets three quotes for their home addition. One comes in noticeably lower than the others. They go with that contractor. The project starts. Three months in, the change orders begin. By the end, they’ve paid 30, 40, sometimes 50% more than what was on the original contract. The relationship is strained. The project took longer than expected. The stress was enormous.
We’ve maintained relationships with many of these homeowners — people who were “almost clients” of ours. They came to us first. We gave them a number. They went elsewhere because someone offered them something cheaper on paper. Then, without fail, they came back with the same story: the final bill looked nothing like what they signed.
The mechanism behind almost every one of these situations? Provisional sums and allowances that were never properly procured before the contract was signed.
What Are Provisional Sums and Allowances — And Why the Difference Matters
Most homeowners use these terms interchangeably. They’re not the same thing, and the distinction matters when your money is on the line.
A provisional sum is a placeholder number in a contract for work whose full scope or cost hasn’t been determined yet. It says, essentially: we’ll figure this out later. It’s a legitimate tool in early-stage estimating. We use provisional sums in our preliminary estimates when we need to give clients representative numbers before full procurement has been completed. The key word there is preliminary.
A contract allowance is a set dollar amount earmarked for a specific item — typically finishes like tile, cabinetry, plumbing fixtures, or lighting. The homeowner makes their selections and the expectation is that they’ll land within that number. In theory, it provides flexibility. In practice, allowances are chronically underestimated by contractors who want to present an attractive total on paper.
The problem isn’t the tools themselves. The problem is when contractors use these placeholder numbers in a contract that a homeowner is being asked to sign as if those numbers are final. That’s where the trap is set.
The Missing Step Most Contractors Skip
Here’s what should happen before you sign any renovation contract in Toronto:
-
Design and full scope are completed
-
The contractor procures actual, firm quotes from all subtrades and suppliers
-
Those real numbers replace the estimates in the final contract
-
You sign based on what things actually cost
Here’s what often happens instead:
-
A contractor builds an estimate based on past projects, square footage rates, or gut instinct
-
They present it to you as a proposal or contract
-
You sign — because it looks complete and professional
-
Trades get involved and real pricing comes in
-
Change orders start arriving
The contractor logic is understandable. They don’t want to invest significant time and money getting firm trade quotes until they have some commitment from the homeowner. We get it. What we don’t accept is presenting unverified estimates as final contract numbers.
For complex projects — custom homes, full home additions, major whole-home renovations — estimating in a vacuum is a serious risk to both parties. Material costs in the GTA shift. Trade availability changes. What excavation was running in Scarborough eight months ago may have nothing to do with what it costs today. A contractor working from stale numbers, or numbers pulled from a different project type entirely, is setting up a conversation you don’t want to have once demolition is underway.
Whenever there’s no firm quote in hand for a scope item, that’s an open door to cost overruns. Every single time.
Where Provisional Sums and Allowances Get Used Most Loosely
Finishes are the most common culprit. Kitchen cabinetry, flooring, tile, plumbing fixtures, lighting — these are the items where allowances are set low to make the overall budget look attractive, then revised sharply upward once you’re mid-project and have no real leverage to push back.
But it can be the entire scope. We’ve reviewed contracts where structural work, mechanical rough-ins, and even permit-related costs were all based on unverified estimates. The entire contract was essentially a guess with a signature line at the bottom.
What to look for before you sign:
-
Any line item described as an “allowance” with a round number (e.g., “$15,000 kitchen allowance”) without documentation of how that number was arrived at
-
Provisional sum items that have no defined resolution process — no clear statement of when and how they’ll be finalized
-
Contracts presented quickly, with little evidence of any pre-construction work behind them
-
A contractor who is vague when you ask which subtrades have provided firm quotes
The single most important question to ask: Has this entire scope been fully procured, or are these numbers still estimates?
If your contractor can’t clearly distinguish which line items are backed by firm quotes and which are still estimates, you’re signing on unverified numbers.
What Most Homeowners Get Wrong
The biggest misconception is that the contract is the starting point — that the real work begins once you sign. For many contractors, the costing work begins after you sign, not before. You get an estimate, you commit, work starts, and the actual numbers surface during the build when your options are limited.
The second mistake is treating all contractor documents as equivalent. An estimate is not a proposal. A preliminary number is not a final number. If a contractor hands you a contract with the same figures that appeared in their first summary email, before any design or procurement work was done, that’s a serious red flag.
Homeowners also tend to focus on the bottom-line number without examining the composition. A $500,000 renovation contract where $200,000 of the line items are allowances and provisional sums is a fundamentally different document than a $500,000 contract where 90% of the costs are backed by actual trade quotes. The first one can easily become $600,000. The second one is far more defensible.
The more pre-construction work done before you sign, the fewer avoidable surprises mid-build. It feels like a lot of front-end time. But if you’re working with a real budget ceiling — not unlimited contingency — that upfront effort isn’t optional. It’s how you protect yourself from a project that keeps expanding on paper while you’re stuck on site.
The BVM Approach: No Final Contract Until the Numbers Are Final
Our process is built around a clear distinction between two types of documents: the preliminary estimate and the proposal.
The preliminary estimate is explicitly labeled as estimated. It contains allowances and provisional sums where needed. We use it to give clients a directional budget while we’re still in early planning and design. It gives everyone a realistic sense of the project scale. But no one signs anything based on the preliminary estimate.
The proposal is different. By the time we issue a proposal, our pre-construction team has completed the procurement work. We’ve gone to our subtrades, received firm quotes, aligned the scope with the design, and built a budget that reflects what the project will actually cost. That’s what you sign.
Where finishes are involved, we bring interior designer involvement into the pre-construction phase. This matters more than most homeowners realize. An interior designer helps align what a client’s vision requires with what a realistic allowance can actually buy. If there’s a gap — if the client wants a tile that costs $40/sq ft but the allowance was sized for $18/sq ft — we find that out before the contract is signed. Not during demolition.
Since we moved to this fully-procured model, the difference is consistent: projects run closer to their original timelines, change orders are rare rather than routine, and clients aren’t hit with surprises mid-construction. When the numbers in your contract are real numbers, the project behaves accordingly.
Key Takeaways
-
Provisional sums and allowances are estimates — not final costs. Treat them as placeholders until your contractor proves otherwise with actual trade quotes.
-
Always ask if the scope has been fully procured before signing any renovation contract in Toronto.
-
Finishes are the most common trap — kitchen, tile, fixtures, and lighting allowances are routinely set low to win contracts, then escalate once you’re committed.
-
Planning is where budget certainty is built. The more pre-construction work done before signing, the fewer surprises during the build.
-
An estimate and a proposal are not the same document. Know which one you’re being asked to sign.
-
The right question isn’t “what does it cost?” — it’s “are these numbers actual quotes or estimates?” The answer will tell you everything about how the project will go.
Frequently Asked Questions
Q: Is it normal to see allowances in a renovation contract?
A: Allowances are common and sometimes appropriate early in the estimating process. The problem arises when they appear in a final contract — the document you’re being asked to sign — before the contractor has replaced those estimates with real, procured numbers. A preliminary estimate with allowances is normal. A final contract with the same unverified allowances is a red flag.
Q: What’s a reasonable contingency to hold back for a Toronto renovation?
A: It depends on how much pre-construction work was done before the contract was issued. On a well-procured contract with firm trade quotes behind most line items, a 5-10% contingency is typically adequate. On a contract built primarily on allowances and estimates, you should be holding 20-25% — because you’re being asked to absorb the contractor’s procurement risk. Make sure you know which type of contract you’re signing.
Q: How do I know if my contractor has actually done the procurement work?
A: Ask to see the subtrade quotes that support the major line items in your contract. A contractor who has done the work will have documentation. If they can’t produce it — or if they say their numbers are “based on experience” or “industry rates” — you’re working with estimated values, not procured ones. That’s not a final contract. That’s a starting point dressed up as a final contract.
Q: What’s the difference between a preliminary estimate and a final proposal?
A: A preliminary estimate is a directional document built on assumptions, historical pricing, and allowances. It’s useful for early budgeting conversations but shouldn’t be used as a contract. A final proposal — the right kind of document to sign — is built on procured numbers, actual trade quotes, and a fully defined scope. Ask your contractor explicitly which document you’re looking at.
Ready to Talk About Your Project?
We do the procurement work before contracts are signed — actual trade quotes, not estimates dressed up as final numbers. If you want a realistic budget picture before you commit to anything, that’s what the first conversation is for.
Book a call at bvmcontracting.com
Related Reading:
-